Since my previous post, I think it has misted or rained part of just about every day. Thankfully, nothing really measurable, and only a couple brief downpours. We certainly could use a dry spell. One thing about the soggy outdoors, is that I have been back in the sewing studio…. Finally! Since starting the Weekly Journals, I actually have been able to make a small piece each week!
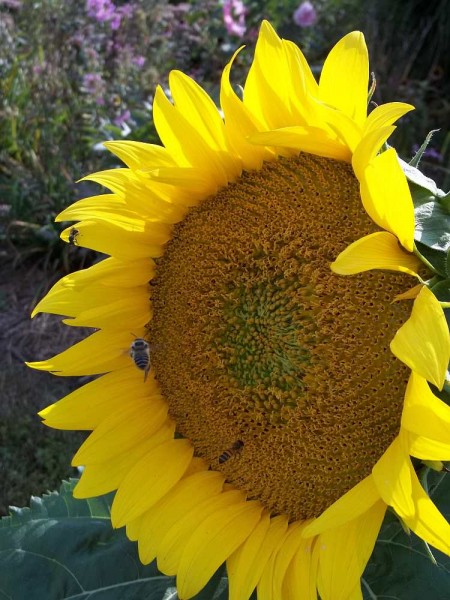
This photo is one that I have taken of my only Sunflower. I didn’t plant it, the birds did, and this is the only one that I allowed to grow… This one grew at the end of the row of planters along the walkway to the driveway. The Black Oil Sunflowers are much shorter than most varieties, and their petals are much shorter… Not as striking as many other varieties, but this one did add a splash of yellow out front. If you look closer at the photo, you can see a few visitors… 3 different typed of bees.
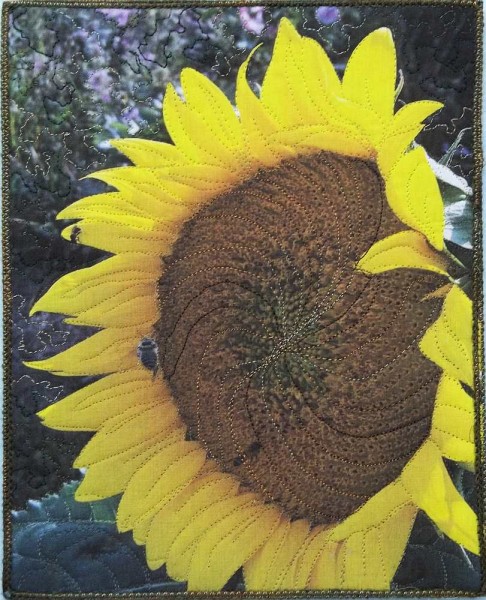
Since my creativity has been near non-existant, for my week 3 journal I decided to print the Sunflower photo onto cotton and play with different threads and stitching over it. Since there is nothing that a colored thread can do to improve upon the beauty of the petals, I used a clear thread there. For the flower center, I played with one way of following the rows of florets. They seem to swirl toward the center, so I did a bunch of repeating “S” curves intersecting in the center. I used a variegated thread in shades of golds and browns, but if I were to do this again, I would use a different thread. In this, the darker brown shows more than I would like… Trial and error… Just what these journals are for….
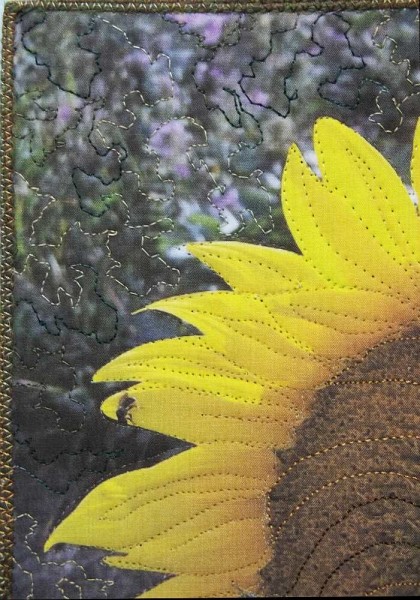
This photo shows a corner of the piece close up. I used a deep green to tanish variegated thread for the fill quilting behind the flower. I didn’t really want the quilting to stand out, so I played with a “sort-of-herky-jerky” kind of stippling. I have never been able to successfully stipple and have always avoided doing it. Since I often have shaky hands these days, I thought I would try the shaky look. With the values in the thread going from very dark to quite light, I tried to get the lighter stitching in the lighter areas and the darker thread in the darker areas… Not sure about the thread choice here, either. Something with less shift in values would have been better, I think. The piece is bound with an earthy, mossy green yarn couched on the edges. Finished size- 8″x10″.
The Sunflower journal was finished in little bits and pieces of time during a very busy weekend, and as usual, I ended up with a major fibro flare (or should I say total Crash). It was a very enjoyable weekend, but I paid for it with days of barely being able to sit up. Finally by Thursday afternoon, I was a bit less wobbly, and while trying to figure out what to do for week 4’s journal, I ended up in a cleaning, sorting and purging mood. It all started out innocently enough when I decided to poke around some of my fabric shelves and then pulled everything off them (piled onto the cutting table of course).
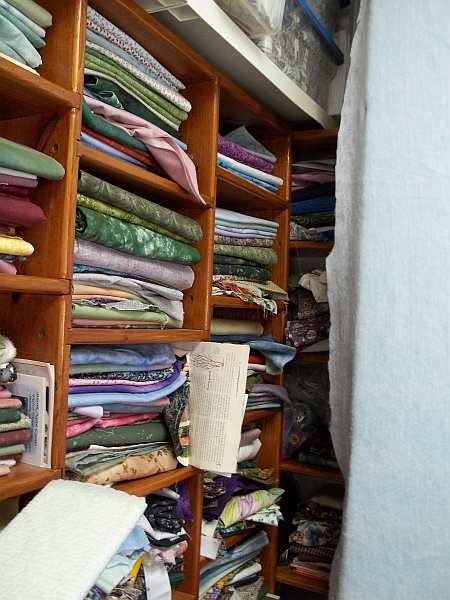
The shelves in question are mostly covered by my design wall, so I really didn’t know just what was there… In the photo above, you can barely see those shelves to the left of the design wall with the batting flapping over them. I found all kinds of forgotten treasures….The main group of shelves that are seen in this photo are just a part of the wall to wall shelves that Ken made for me that cover two of the studio walls. Most of the end wall shelves are behind the design wall.
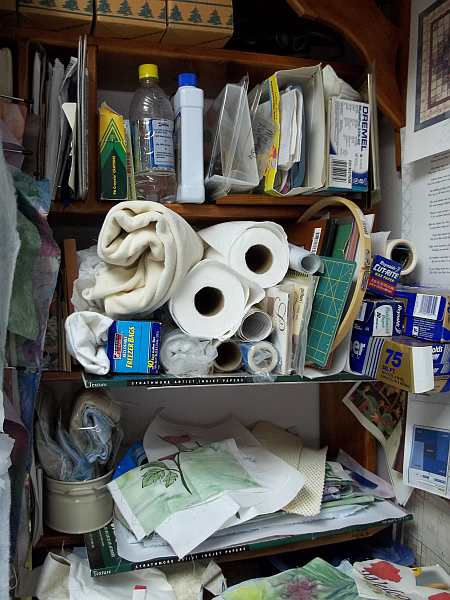
From this view, you can see my ironing board and machine past the cutting table. The pile on the table was shoulder high at this point. Buried on the shelves I had emptied, were rolls of Contac paper, Freezer paper, various types of stabilizers and more. I decided that these would be much more accessible if they were on the shelves to the left of the ironing board…. Next step… empty those shelves too… The photo above was taken after those shelves were filled back up.
All the rolls of various stuff that is necessary for creating are now neatly on the shelves where I can easily see them and use them. I did have to do a bit of fudging to make the shelves deep enough to hold the rolls so the ends would show…. Foam core is wonderful stuff (inside the empty Strathmore Paper boxes)! I even have a shelf that I will use for stacks of Wonder Under backed fabric pieces that are too big for the containers I store them in. There are clear containers of various sizes and shapes with the smaller “Wonder Undered” pieces on the shelf that is even with the ironing board surface…. (buried in the photo above).
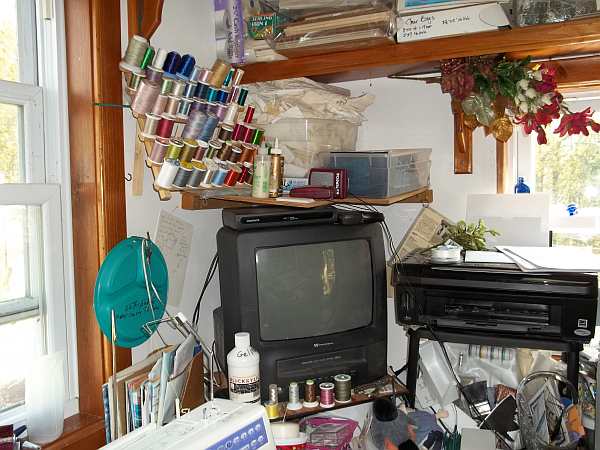
Well, as any cleaning session tends to go…. cleaning one area led to clearing and re-organizing other areas. The corner shelf above the TV was a real problem…. I had nearly a garbage bag full of Wonder Under backing papers that were stuffed on that shelf. I usually save all the backing paper because it comes in really handy, but there is a limit to how much of the stuff I really need. Now with the excess gone, I now have a couple of tubs of fabric there.
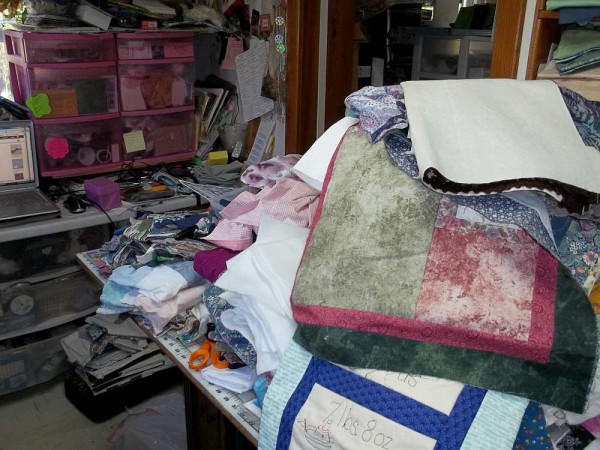
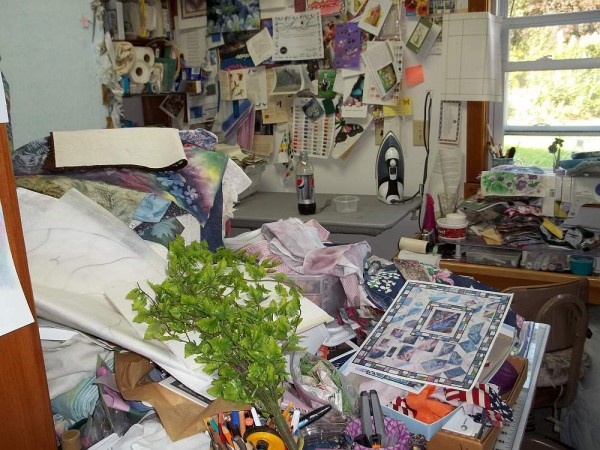
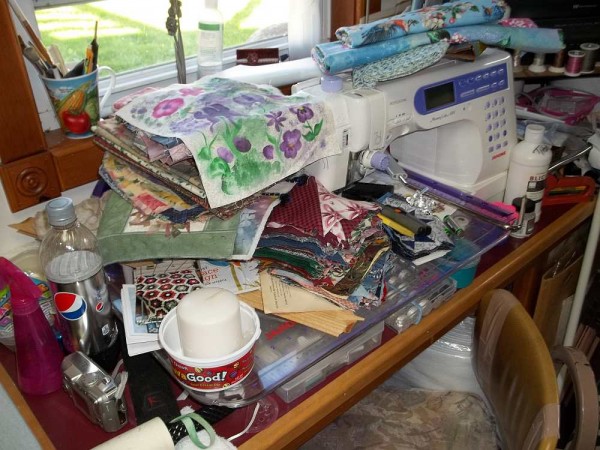
The cutting table is not the only thing that got buried in the cleaning process…. Why is it that things always look so much worse before they get better. I found a lot of random blocks, WIP’s, and odd fabrics. The painted piece on top of the pile is a piece of fabric that I played with years ago…. Lots of random flowers and leaves, etc.
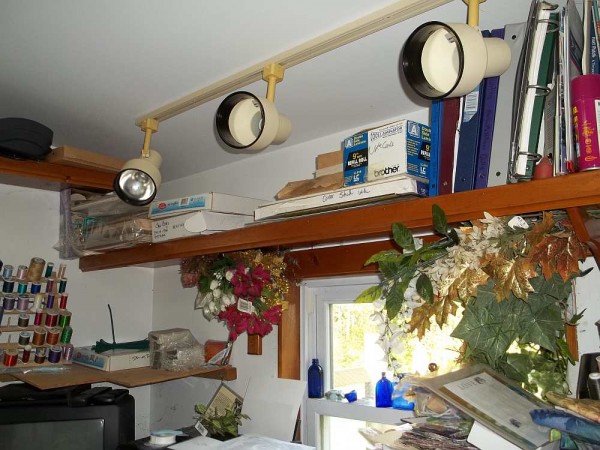
Here is a photo of the TV corner before I put the tubs of fabric on the corner shelf. The shelf above the window was another disaster zone that had random UFO’s, tissue and other papers, and whatever… I cleared everything off, and decided that this would be a better place for my backer boards, mats, archival bags and wide format paper. These things were on the shelf over the ironing board, and needed to climb on my chair or use a step ladder to get to them.
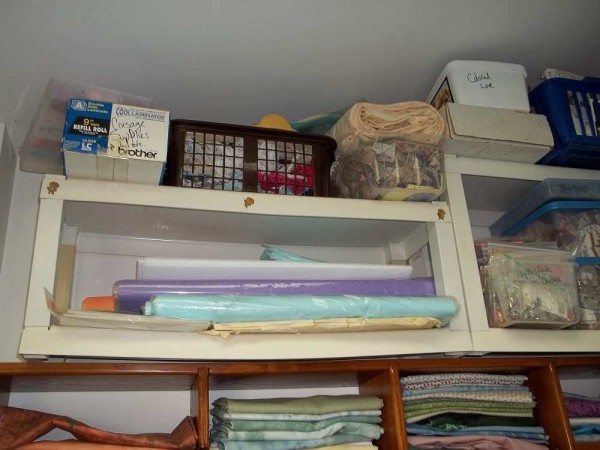
Above the shelves by the cutting table, there are more shelves to the ceiling. This area is a bit out of the way, but I can access things without too much trouble, so I decided that the papers could be stored on the lower shelves. Things higher up are used rarely. There is a tub of random, fun collage goodies to the right of the rolled papers.
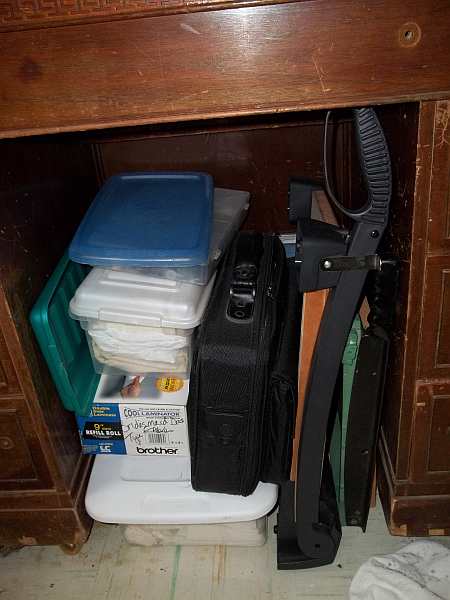
This area under the cutting table is also a bit neater. I am not happy with where the paper cutters are stored, but for now it will work. The laptop case contains my “traveling beading studio”. More white and off white fabric pieces and scraps are in the plastic tubs.
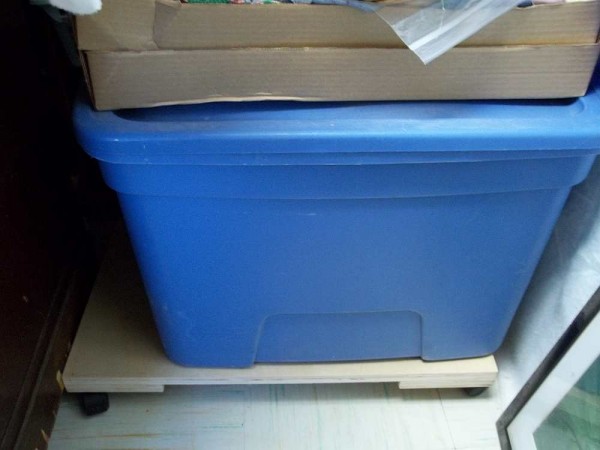
This is the space between the cutting table and the design wall… just enough space for this plastic tub. During this cleaning spree, I even took everything that was piled on top of this off (and added it to the cutting table), and sorted out what was inside. I thought it would be great if I could have it on wheels, and was going to do a “Suzy Homemaker” job of putting casters on a piece of plywood, but Ken did this up for me! A much nicer job that I would have done. Now I will be able to move this out of the way much easier if I need to access the shelves or electrical panels behind my design wall. I won’t kid myself….. this will probably be stacked up again, but it will still be easier to move (so far only two flat boxes of scraps are there now).
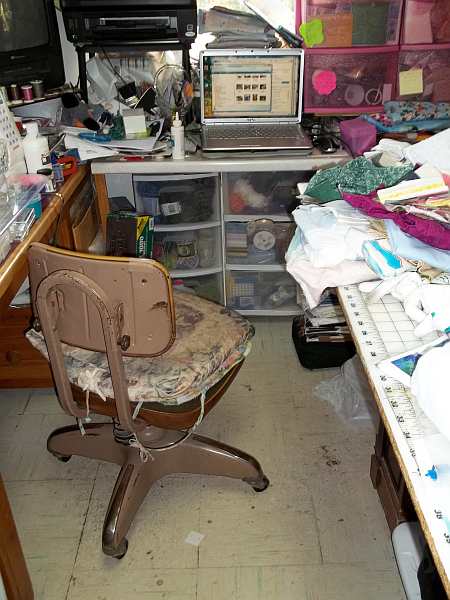
Just to be sure no one thinks everything is in order…. it’s Not! The counter to the right of my machine with the laptop and printer and drawer units isn’t getting organized this trip…. I don’t think…. the area my chair is in is not that roomy…. While I am sitting in it right now typing this, the corner of the cutting table is at my back…. The floor does need cleaning, but it will never be pretty again… most of the black that shows is where the top surface of the tiles has worn off from my chair rolling over it. It was supposed to be commercial tile, but it didn’t have the nice glossy finish that it should have had on it. In order to have the room I do at the design wall end of the room, the table is rolled to block more than half of the doorway…. Pretty cozy…..
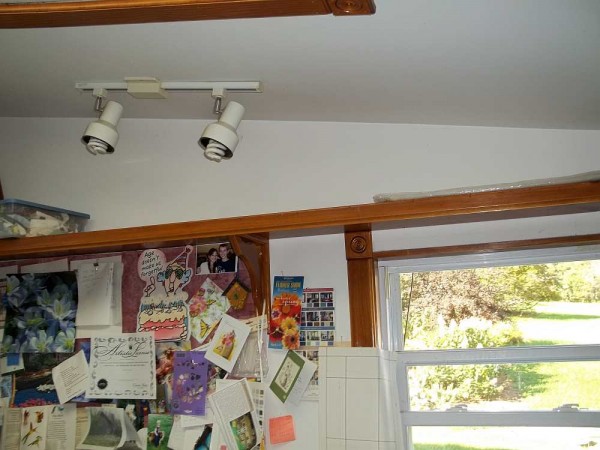
So far, the shelf above the ironing board and sewing machine window is pretty empty. This is where I stored the backer boards, mats and bags…. really hard to access because it is higher than the top of the shelf units which are 6ft high. I will probably be stacking clear plastic tubs up there with various fabric bits and pieces. Ken made the two shelves over the windows too. I can use every bit of wall space for storage to the ceiling on every wall.
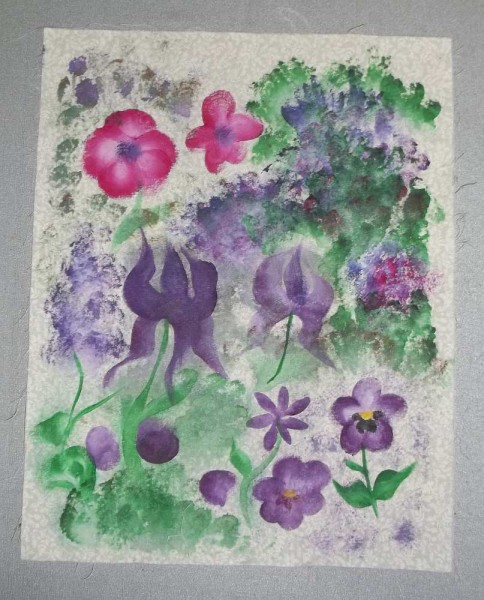
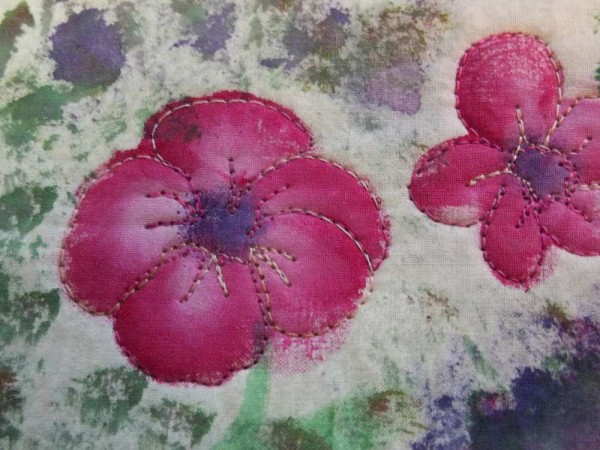
Here is a photo of that fabric painting sample that was on top of my machine a few photos back. I was experimenting with painting flowers. This has been hiding out for many years…. I think I did this before I really got into sunprinting. Since I ran across this, I thought it would work for this week’s journal piece.
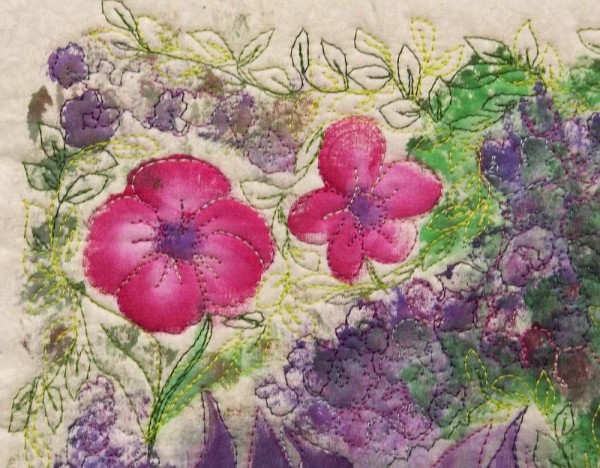
I decided to play with various threads like last week…. I began with a cranberry to light pink variegated for the bright pink flowers.
I did some of last week’s jerky stipple type stitching for the paint dabbed floral areas. I started with some of the cranberry thread, then switched to a purple to rose to lavender thread for more of the random flower look.
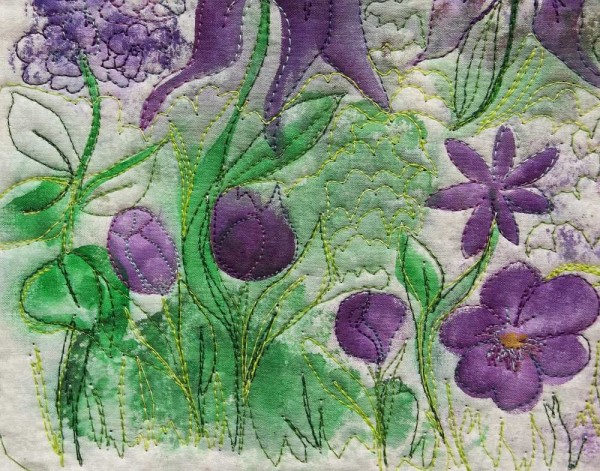
I used the purple variegated for the rest of the purple flowers, then used a variegated green with deep to lime shades for the foliage. I tried to make the purple painted blobs look like Tulips. I used the greens for a grassy look along the bottom. I also outlined the leaves for individual flowers and did a sort of upside down scallop for random foliage.
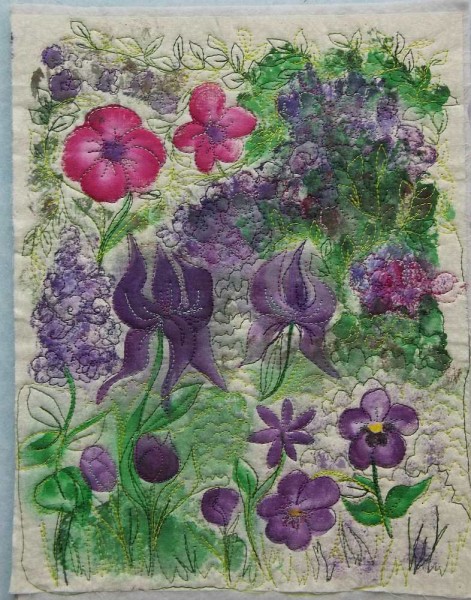
And here is the full view of the piece. It is just over 8″x10″ in size. You can see the Irises and to the left, what looked to me to be an attempt to paint a Delphinium, so I stitched it that way. This is by no means very artistically correct, but as a piece to play with I learned more about what I do and don’t like about using variegated threads. I didn’t bind this piece because it may be screaming to be cut into small sections that would look better separate from the whole.
Now that I am 4 whole weeks into making these journal pieces, I am feeling really good about getting myself into the studio and actually stitching something at least once a week. Now that the studio is almost reorganized again, maybe it will be easier to find things and maybe I’ll get that “creative groove” back!




Dear Sue,
Brava for cleaning out and reorganizing your studio! Mine has several large piles of forgotten stuff which is encroaching on my active workspace something terrible. It takes a lot of energy to clean, but less energy than it takes to cope with chaos. Maybe if I keep telling myself that, I’ll actually get of my dead a#* and do it!
Anyway, thanks for the inspiration,
Linda Laird
quiltart reader
I love the journal quilts you did … and as it always happens creativity returns and you will be creating like you never did before…congrats on the organization. Just wanted to share a tip with you …about your chair, I had one like that and absolutely loved it…unfortunately it did not make it with me on the last move. BUt I digress…look for some great Pillow Cases and they make great chair covers for both the seat and back….just slip them on and pull the excess to the back and safety pin it or as I did tie the corners with ribbons….just thought I would share…one more step to making the studio a welcoming place…
Have a very creative and fun day
Thank heavens someone else acknowledges her messy studio! I am at the point where I have space to sit to sew, stand to iron and cut, and there’s a narrow path to the stash closet. Otherwise, chaos. Some of us will never have the pristine creative spaces shown in the magazines–I used to aspire to that, but am old enough to recognize reality, and it’s not a neat picture. However, it really is fun to unearth old UFOs and other treasures when you dig through the piles, isn’t it?