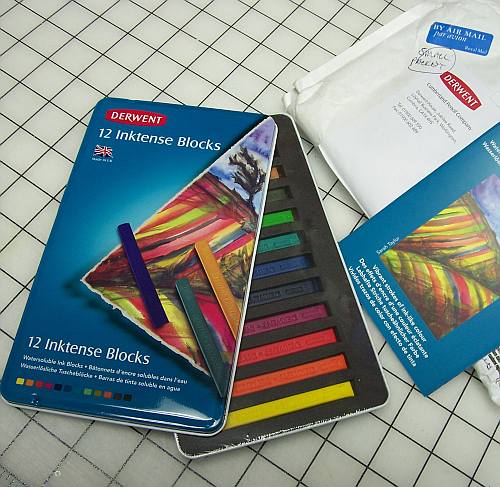
I was amazed a while ago when I left a comment on the Facebook page of Derwent Pencils for a chance to win a tin of their brand new Inktense Blocks, and WON!! I was one of five winners, and my new tin of fun arrived over the weekend.
I spent the weekend with a nasty fibro flare, so I didn’t do anything with them until yesterday. I got a design drawn out on some cotton fabric backed with Wonder Under with the paper backing, making it easier to draw on…. Today, Tuesday, I finally cracked open the plastic seal on the Inktense Blocks.
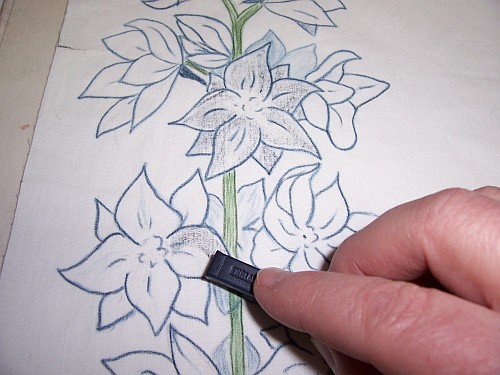
This month’s theme for the “Arts in the Cards” ATC group is Indigo… anything goes that uses any shade of blue. My first thought was Delphiniums, of course…. I love them and they come in so many great shades of blue. I first drew (actually traced an enlarged drawing) a Delphinium stem lightly in pencil, then outlined the flowers with my Deep Indigo Inktense Pencil. After outlining, I went over the Inktense with something I have had lurking in my supply drawer for well over a year….
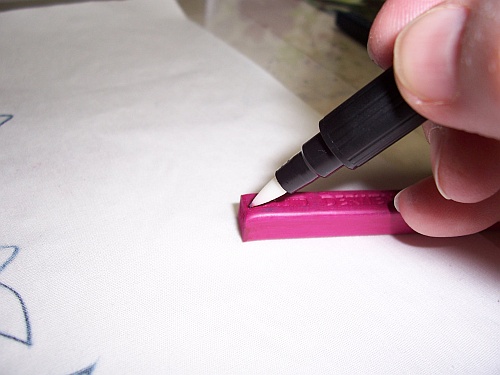
In the above photo to the right of the colored pencil is what I found works super for wetting the Inktense pencil, causes minimal bleeding on the fabric, and is so much easier for me to use than a tiny paintbrush with water. I bought a set of blender pens at a Stampin’ Up! party for Scrapbooking. I first intended to use the pens with my water soluble wax pastels (I also bought colors of those I didn’t have yet that were demonstrated that night). Due to the creative block problem, I had not even opened up the box of 3 pens I bought until now.
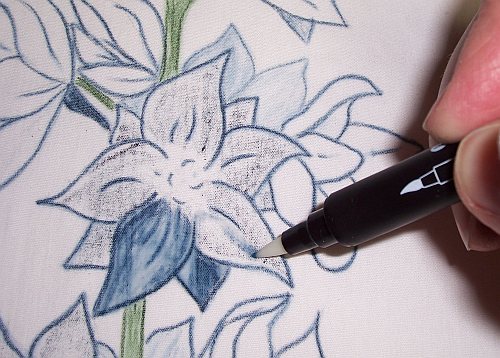
As you can see in this photo above, the blender pen has a nice sharp tip and is easy to control. You can see how the color of the Inktense pencil intensifies when water is added to it. My first attempt at using my pencils with the Chickadees was a real learning experience. It took a lot of time to reload the brush with water and(or) medium. The blender pen fed a constant supply of water to the tip…. It was just like tracing over the pencil with a felt tip pen.
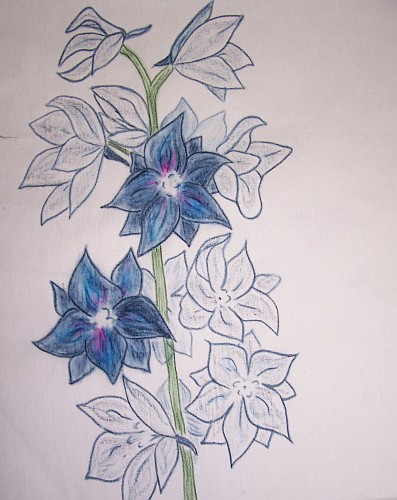
This photo shows what a section of the Delphinium florets looked like after they were outlined with the Inktense pencil and then dampened with the blender pen. I finished all of the outlines, then allowed the fabric to dry. The Inktense pigments are permanent after they have been totally dissolved with water, then dried.
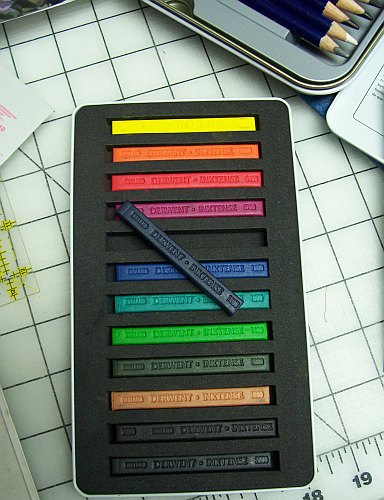
Once the outlines were dry, the fun began with the Inktense Blocks! The new blocks are the solid pigment, without the outer wood of the pencils. They look like, and can be used like pastels to add color to a project. I made a few sample marks to get a feel for how the blocks would work. I began with a swipe with the full end of a block, then drew a line using a corner of the block. The block used in the above photo was the Deep Indigo, the first wide one was pressed harder than the second wide one. It looks nearly black when dry, and the first marks I made left a few crumbles as the edge was smoothed up. I brushed off those loose bits into a little cup. I will show what I did with the “crumbles” later….
I used the end of the block to fill in the petals with color. I didn’t add too much to start, so I could test the waters, so to speak.
You can see what a difference the water makes with the Inktense pigments. The first lines that I colored and dried stayed in place nicely, and it did not take too long to really brighten up the flowers. The blocks are great for coloring larger areas without getting the “scribble” lines I always end up with using the pencils. Using the blocks on cotton fabric is a little more challenging than smooth paper. The weave of the fabric grabs the pigment from the blocks, causing some streaks and more color to be laid down where the backing paper had wrinkles, too. “Scrubbing” a bit with the blender pen helped to move the color to where I wanted it.
Another way to use the Inktense Blocks is to treat them as you would a solid watercolor paint. I wanted to add a bit of purple to the flowers, so I used the other tip of the blender pen (each pen has 2 tips) like a paint brush to pick up some of the pigment to accent the flower petals.
The above photo shows the Fuchsia Inktense added to a floret. I had already added a bit of Sea Blue over the Deep Indigo to vary the color in the petals more like they are in nature. The first streak or two of the Fuchsia were a bit intense, but with a bit of work I was able to blend them in a bit.
This photo above shows two of the florets fully dampened with all 3 colors used. The rest of the florets have just been colored in with the dry blues, ready for water.
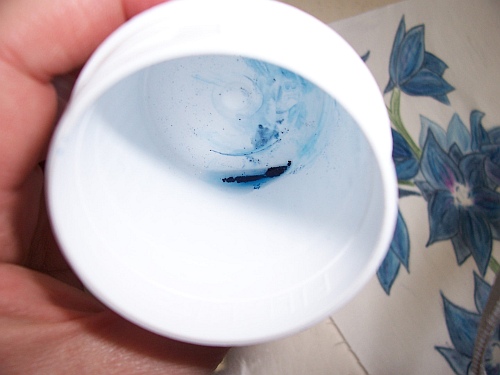
Ahhhh…. back to the crumbs….. I brushed the crumbles into a bottle cap and dropped a bit of water onto them. This is another way the Inktense Blocks can be used…. They can be grated and mixed with water to make a liquid watercolor paint. To play with my flowers, I just added a drop or two at a time and used the blender pen as my brush.
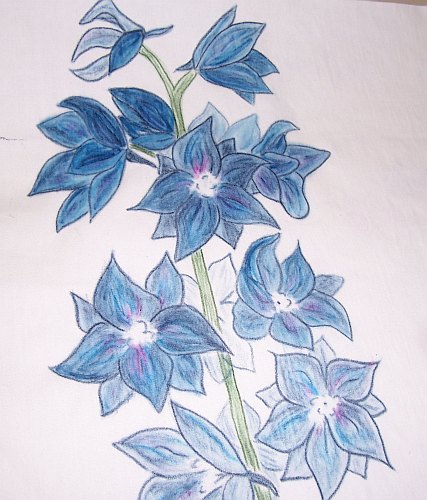
The final photo for this post…. I used the crumbs mixed with water to add more color to the petals. There were crumbs of both shades of blue, so that helped to even out some of the streaking I ended up with. The upper florets were still damp when I took the photo and looked a bit deeper than they ended up. The lower ones that are quite light hadn’t been painted over with the liquid color yet. I will let this dry over night and see what I decide to play with for the background… I am not sure what color I will try yet….. To color in the large background area, the blocks can be used along the long edges to quickly lay down a lot of color. I am toying with the idea of using a very light touch of the Fuchsia for a pale pink background that will add a cast of pink over the flowers, too if I just go over the whole thing with the color… I plan to add a bit of pearlescent paint to the floret centers, so losing the white there will not be a problem…. Tomorrow I will try to have another update….







Ok – Sue, you have my mouth watering…..I’m saving for these for sure!!! I
have Derwent’s 72 Inktense pencils and LOVE them, but I see so many possibilities with those blocks! Hope you send a link to Derwent……
GREAT JOB!!!
I was addicted to the colored pencils stix for the longest time until I switched to fiber. Now seeing these, I am going to have to get some to play with! I have been using Neocolor and the inktense pairs nicely with them! Thanks for the great tutorial!
Hi Sue,
Great post, I love Inktense pencils and can’t wait to try these. If I use that on clothing, is it washable?? I never thought to use it on fabric.
This is a really useful description. I have some pencils and have played with them. I can really see the advantage of the blocks. Where, by the way, did you get the blender pen? It looks like a good tool to have. Thanks for sharing this!
Lovely colouring. I have just ordered the blocks, and have the brushes with the water reseviour but you blender pen seems so very much better. Who makes it or where did you buy it?
Love the work you have been playing with.
The blender pen I used is one from the Stampin’ Up! company. A friend invited me to a Scrapbooking party and I saw the pen being demonstrated. I also found that there is a LePlume brand of blender pen that looks pretty much the same. Here in the US, the LePlume pen is available at Hobby Lobby according to a Google search.