
A new Mini Tutorial!!
I have finally been getting in some productive studio time. I love to incorporate my flower photos into my work, and transferring them onto fabric from transparencies is one way to do that. You can see lots of my flower photos here in my Main Blog. This is the technique I have found that works best for me…. there are many methods that I have tried, but this is the only way that works for me. It might not be the best for everyone, but here is my process.
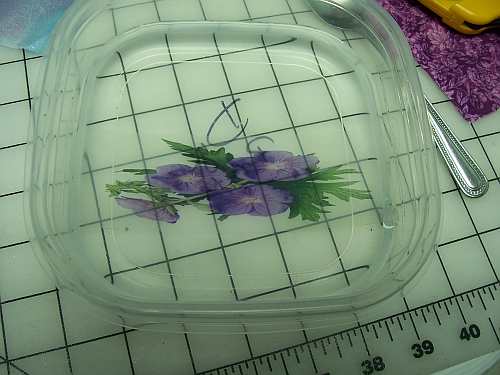
Transparencies
I begin by printing the photos I want to use onto Transparencies made for inkjet printers. The brand I am using is Hammermill… What I found at Staples. I print with an Epson inkjet printer that uses DuraBright inks. These inks are archival, and I can print directly onto fabric if I want to. This transfer method gives a more antiqued or aged look to the transferred photos. Above are a selection of photos printed according to the transparency directions. I set my printer for “Best Photo” printing and plain paper. With my tests, this has worked the best for me. The printed transparencies are placed over dyed fabrics that I am thinking of transferring the images to. I can see what will and won’t look good before I start anything.

Dyed Fabric Base
Above are a couple of pieces of fabric I dyed that didn’t really turn out just like I wanted, but will make for good backgrounds for the transfers. I lightly dampen the fabric, then apply a coating of very thinned Heavy Bodied Gel Gloss Medium. I am using Golden Brand for this batch of transfers, but I have used Liquitex Soft Gel Medium with similar results. The medium helps to seal the base fabric so it is not so porous to take the transfers better.
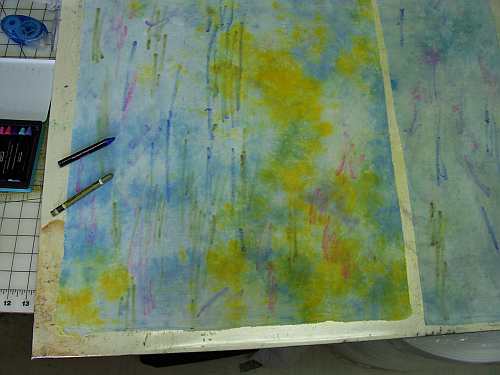
Wax Pastel on Fabric
To add more interest to the pieces, I have added Water Soluble Wax Pastel to fabric while the medium is still wet. I have just scribbled various colors on.
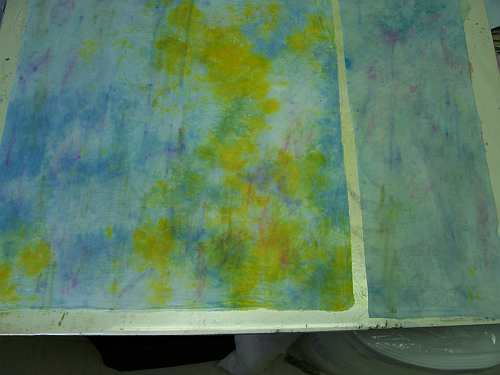
Wax Pastel Brushed Into Fabric
The above photo shows the fabric after I blended the pastel into the medium.
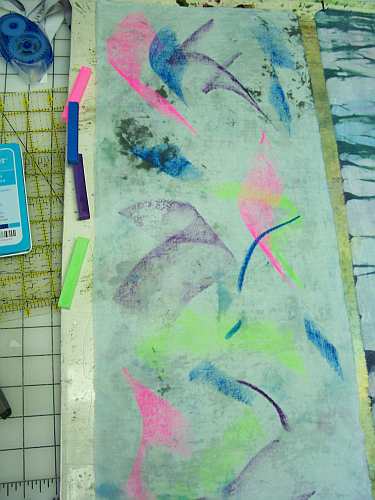
Dyed Fabric with Chalk Pastel
Here is another piece of fabric… another dyed piece that didn’t have much color, so I added more with chalk pastels this time to start. I decided to play with some wild colors here…. they look really bright on the wet fabric, but will soften after blending and as the fabric dries.
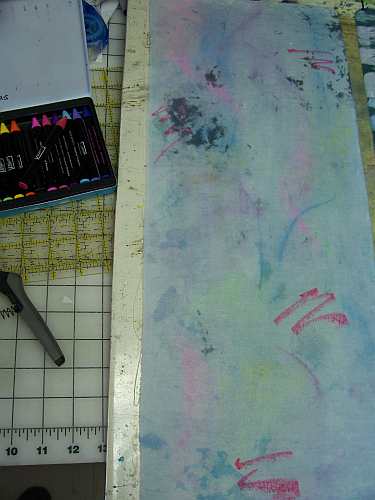
Chalk Rubbed In Wax Added
Here is what the chalk looked like after being blended in. I then added some wax pastel for even more color in scribbles that I then blended in also.

Fabric with Transparency Images
Here is one of the fabric pieces after it dried and was ironed between parchment paper. The photo above shows one transfer already done, and images on transparencies cut out and placed where I want to put them. You can see how the colors of the fabric will change the image colors.
Soaking Transparency
When I am ready to do the transfer, I soak the image on the transparency in lukewarm water in a shallow container.
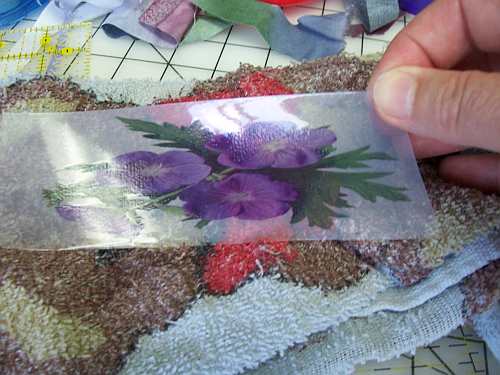
Image Soaked in Water
I let the image soak for about 10 seconds, then take it out and hold it over an old towel to catch the runoff. You can see in the photo above, the ink is beginning to “bubble up”. When all the ink has begun to bubble, the transfer is ready to be applied. Darker ink colors seem to take longer than others to be ready for placement.
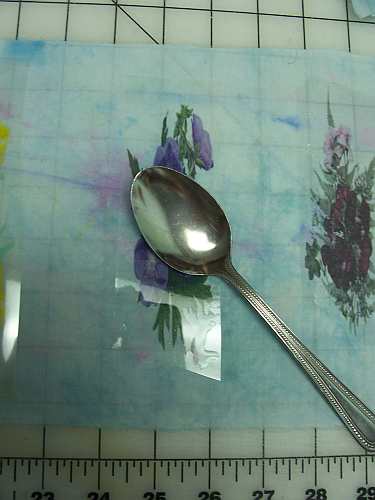
Rubbing Transfer
I lay the image ink side down on the fabric, then burnish the back of the transparency with a spoon until totally covered.
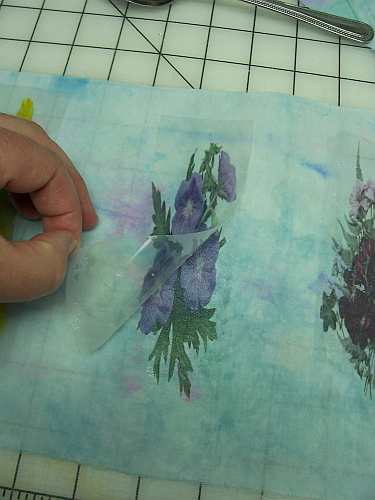
Removing Transparency
Once the whole back has been rubbed, begin to peel the plastic off slowly. If the ink sticks to the transparency, it may need more moisture and rubbing.
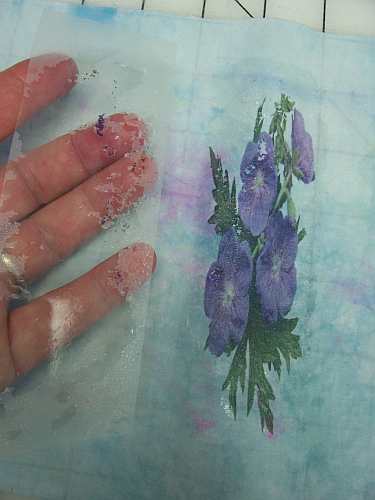
Finished Transfer
Here is the transfer after the plastic backing has been removed, the ink and coating on the transparency sticks to the prepared fabric. On this transfer, some small bits of the image stuck to the plastic, this gives the aged look to the transfers.
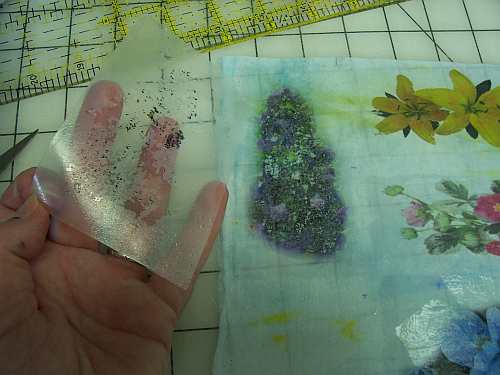
Another Transfer
The above transfer is one that didn’t soak long enough… the deeper colors didn’t stay on the fabric very well, so this one really looks distressed.
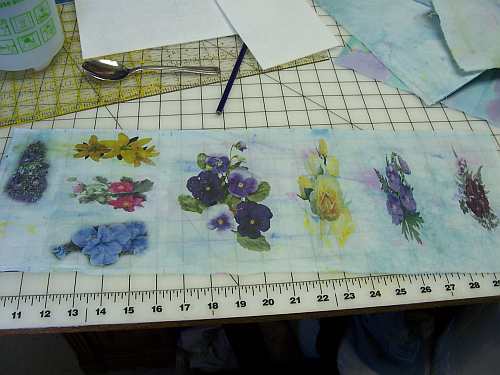
Group of Transfers
This photo shows the whole piece of fabric that I did with a number of transfers ready to dry. These will probably be used on various covers for mini composition and brag books, or standard sized composition books. I will combine the transfers with different dyed or painted fabrics to coordinate with the images. These will be available for purchase in my Andrus Gardens Gift Items Studio on Artfire when I finish them.
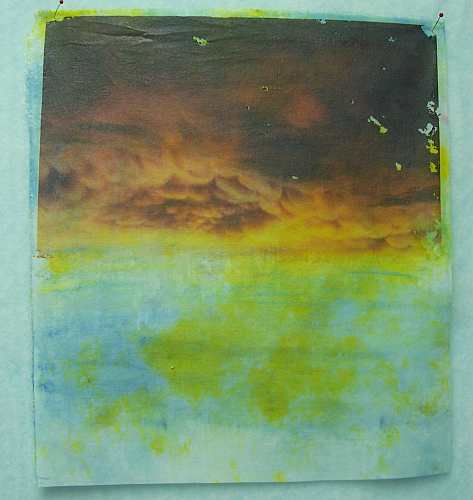
Mammocumulous Cloud Transfer
This is the largest transfer I have tried so far… it is the full length of the transparency, nearly 11 inches. I used the fabric with large yellow areas to pull the color down from the image. I removed some of the ink from the image’s lower edge to help it to blend into the fabric. I then added more pastel for more color below the transfer. This will become a small art quilt based on one of my photos of the stormy skies just over a week ago.
Once the transfers dry, I cover them with parchment paper and iron things well. This flattens any rough edges that sometimes occur from the coating on the transparencies. The image can melt and stick to your iron, so be sure to use the parchment.
I am a former textile artist and new pattern designer with a degree in horticulture, wishing to share my love of nature, flowers and gardens with everyone through my photos, sunprinted fabrics, and now pattern designs. Chronic Lyme Disease has caused major changes to the direction my life. I have to limit the amount of time spent digging in my gardens, and quilting has become more difficult. I discovered pattern design as a way to get art back into my life. I now use my gardens and photos to inspire designs that can be used on fabrics and print on demand items.


Sue, I love your clouds…they are fabulous. Please tell me, do you let the gel medium dry on the fabric before you use the transfer…or burnishing the transfer while the gel is still wet/moist?
Thanks for sharing!