February is now passing very quickly and has been quite event filled…. The best part of the winter (for me anyway) is the local quilt guild’s retreat. A big group of quilters from the Endless Mountains Quilt Guild got together at Watson Homestead, a large retreat center not far from Painted Post, NY. We spent 5 days quilting and socializing, with everyone doing whatever projects they wanted to bring to work on. I always end up taking too much with me… I never know what I will want to work on before I go, so I take a mini van load.
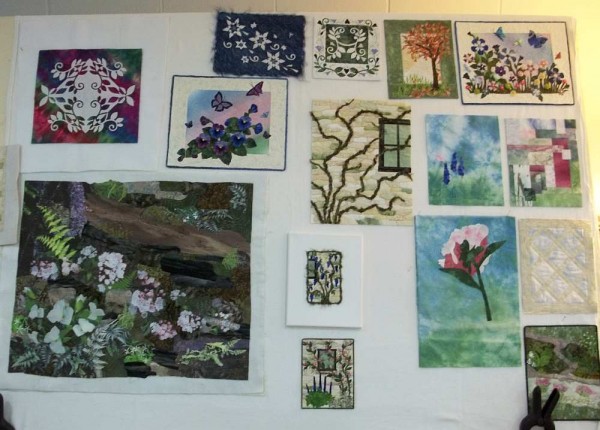
The first thing I did upon arrival and getting things relatively set up to work was to pull out the bunch of Works in Progress I took along. This photo shows my 4’x6′ piece of foam board covered with flannel that was perched on a piano in the corner of the huge room we were in. The clamps were clipped onto the piano with padding to protect the wood. This worked great because it sat at an angle that let everything I put on the wall to stay…. except for the canvas I was trying the tiny Wisteria piece on… I did have to pin that. This photo was taken on nearly the last day and has two little pieces I finished on it- The Pansy piece below the “Blowing Snow” middle left, and the little “Roses on the Window” piece lower center. I did also get a bunch of quilting done on the woodland piece lower left that was started at a retreat 2 years ago and hadn’t been touched since…. Finally a little progress!
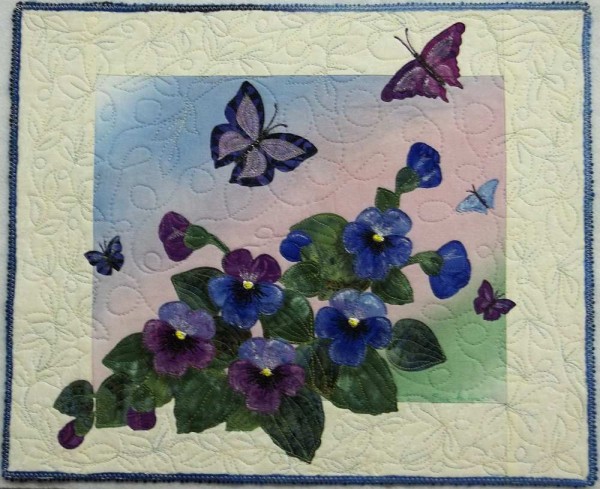
Here is a photo of “Pansies and Butterflies”- 11″x13″ in size. I had the flowers and leaves fused to the background before I left for the retreat, and finished it there. I created the Pansy flowers by cutting up and combining parts of large die cut flowers and a small leaf die cut. It took a lot longer than I expected to finish it and I found out a few things I would do differently in another piece. I used paint and Derwent Inktense pencils to add shading to try to get the flowers to stand out from the foliage.
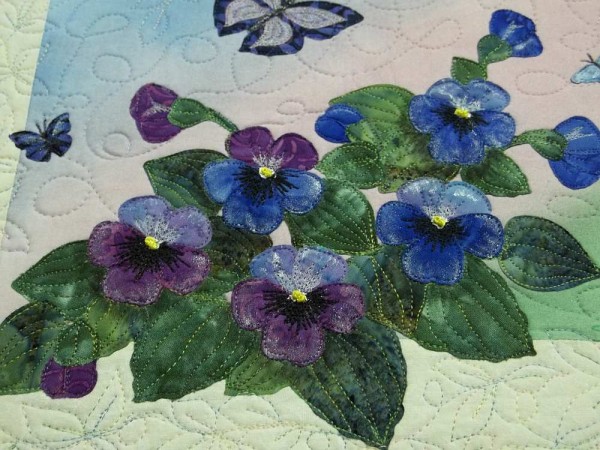
The photo above shows the flowers up a bit closer. I used white pearlescent paint for shading on the flowers that looks brighter in the photo than in real life. The Pansy faces were stitched on using black thread, and the centers began as dots of pearlescent paint with yellow French knots of heavy rayon thread stitched on. The one main thing would to differently would be the largest butterfly… It needed something, so I added some organza fused onto the wings. Then, I found that using thinned white pearlescent paint worked even better… I used the paint on the other butterflies and prefer the look of that…. The organza seems to overpower that butterfly (not quite as much in person as in the photo). The leaves were quilted with green thread, while the flowers and sky swirls were done with clear thread. The outer border areas were stitched with a variegated thread in soft baby colors, and the edges are bound with a yarn in shades of blue.
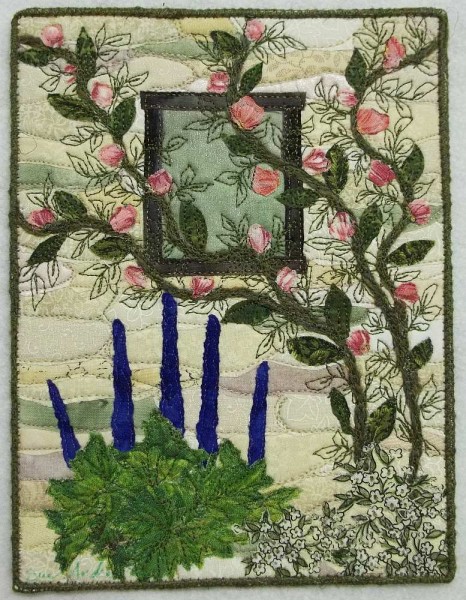
“Rose Garden Window” is another little piece that I finished at the retreat. I had the base with the stone wall and window done with the couched yarn Rose vine. I had the Delphinium clump fused and arranged, ready to add probably a year ago. This finally got it’s flowers and the leaves fused and more leaves stitched on. The Delphinium leaves needed a bit of touching up with the Inktense pencils, since they were a bit too bright a green. This is bound with the same green yarn used for the vines. “Rose Garden Window” is available for purchase in my Andrus Gardens Quilts ArtFire shop.
Just before I went on the retreat, I had designed and practiced a craft project for the Wednesday Kids at church. While doing the practice pieces, I found a problem that I hoped would not be an issue while doing it with the kids with a bit of a modification, but with 18 instead of the usual 12 kids the first night we tried the project, I ended up with some messy failures. (Even Epson ink printed onto Crayola Glitter paper will dissolve when brushed over repeatedly with a thin glue mix.)
I printed a bible verse on the glitter paper that the kids love to use, and thought that gluing some of my bleeding tissue paper over it would allow the verse to show and add some bright color. NOT! If the text was just brushed over with the glue one time all would have been fine, but kids love to keep on brushing so the ink smudged and smeared. I was able to guide the kids to cover up the smudges then re-printed the verses after taking the projects home and finishing them.
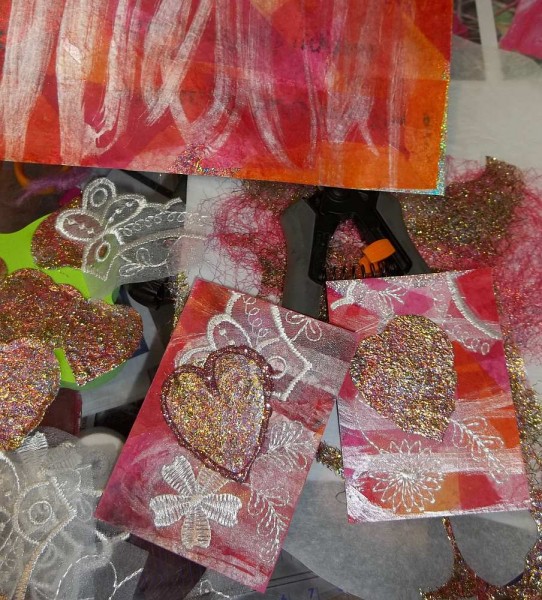
In the above photo, you can see what I did to some of my failed practice pieces of paper that I decided to use as the backings for the “Arts in The Cards” group February cards. The theme this month is Red, so I used mostly red tissue with a bit of yellow and pink added too. In the photo, you can see the piece of paper that hadn’t been cut up yet, and some of the text shows a tiny bit. I worked with half sheets of paper and was able to get 4 cards from each. Also in the above photo you can see some of the hearts I die cut from fused Angelina fibers, and some embroidered organza that I had backed with Wonder Under and cut motifs out of.
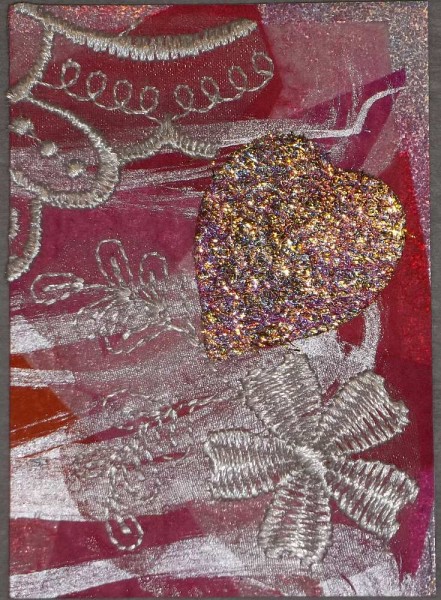
One of the cards in progress is shown above. The pearlescent paint on the paper and the Angelina fiber heart reflected the flash when I took the photo. You can also see the white embroidered motifs from the organza.
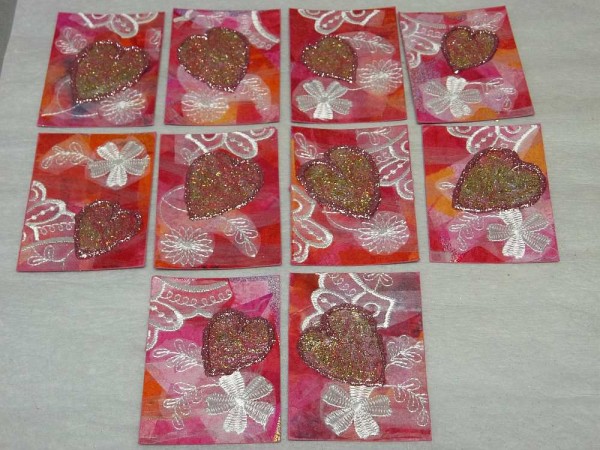
Once all the lacy motifs and hearts were fused on the cards, I added a bead of glue around each heart and added fine pink glitter to add even more sparkle. Then edges of the cards were colored with a bright ink pad brushed over them. Each card has it’s own personality. When finished they seemed to look pretty romantic, so they were named “Romance” If I was a week or so faster finishing they would have been perfect Valentines.
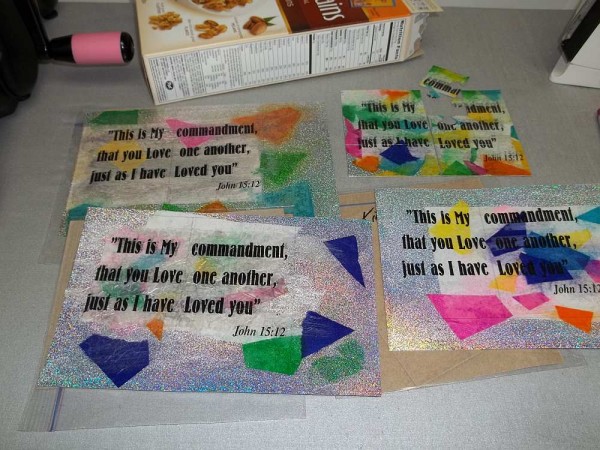
This photo above shows what I ended up doing with the kid’s projects. The tissue paper and glue covered paper was coated with gel gloss, then run through the printer to re-do the verses. If you look close at the upper right one, you can see that there is a shadow of the original text. Each half sheet of paper was backed with cereal box cardboard fused to it, then I cut the pieces to nearly the finished size I needed to run them through the die cutter with the puzzle die. Each project was cut into two puzzles that butt together. Extra paper cut off gives each kid a couple pieces to use as bookmarks. The upper right one has been cut and I moved one piece out to show the puzzle a bit better. I have 18+ of these all cut and bagged ready to get to the kids this week. The cereal box cardboard fused to the heavy paper gave a nice thickness for puzzles.
I still have to finish up another batch of the projects that were done by the younger group of kids by Wednesday night.




Thanks for your support for my work! Aren’t the bee retreats the best? They certainly are for me. You seem to have done great things at your retreat. And the kids project is wonderful. Lucks with the projects of the kids! Janet Jo
These are lovely. Thanks for sharing.
Janet Jo, I’s fun seeing what you keep come up with 🙂 I wish I was able to attend more than one retreat a year… I seem to get more accomplished without things around the house distracting me….
Thanks Ann 🙂