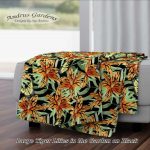
Posts Tagged ‘work in progress’

“Two” Many Ideas and More

Saturday, January 14th, 2012

The first post of the new year…. now that we are nearly 2 weeks into it….  I have actually finished a few little quilts in addition to my latest set of art cards for the “Arts in the Cards” group.  Each month a new theme is chosen as a guide for the cards we send out to each other. I have only been a member of the group a year or so, but this  month is the second anniversary of the creation of the group, so the theme was Two.

My Inspiration

The above photo shows one of the inspirations for my cards. Actually, I had originally thought that I would do a tiny quilt with a pair of Tulips blooming on it… Two Tulips, but while experimenting with a new die cutting machine, I happened to notice that some of the vine and leaf die cut pieces looked like they could be twos, and another idea began to form. I then thought about “two peas in a pod”…. another idea (see little “peas” upper right in the photo above)…. THEN came the Google results…. I found that the traditional gift for a second anniversary is cotton (ok, cotton Tulips would work), then I found that there was a flower for that anniversary- Cosmos…. I love Cosmos and more ideas were flowing.  I should have stopped at that, but I pulled up a dictionary which had the definition and tons of extra information, too…  I did some playing with the definition and other words from the dictionary in a word cloud program. The program put the words in different sizes and colors in random order and I did a print out (also showing in the photo- upper left).

Printed Insides

By the time I got  done with playing on the computer, I  realized I had too many ideas to put into one little art card, so I decided that I’d add another two… Two cards.  The photo above shows the text I ended up with along with more that I added, printed over photos of Two white Cosmos flowers. I decided that the two cards would be connected in a hinge fashion with one long piece of the printed card stock. The photo above shows 3 of the inside pieces printed and in the process of being cut to size.

Creased Insides

Once the insides were cut from the card stock, the center creases were made. I also ended up fusing some little “scraps” of the vines that also looked like 2′s in the inside.

Peas

When I first thought of doing “two peas in a pod”, I needed to figure out how to make the peas…. I squeezed out drops of a metallic pea green paint on parchment paper and allowed them to dry over night.

Tulips Start

Above shows one of the little Tulip sides that I decided to make as tiny “quilts” using a thin interfacing as a “batting” so that I could do the stitching.

Two Vines Fused

In the photo above, the die cut vines with leaves 2′s and single leaves fused and “smushed” to make little pea pods.  The background fabric for these is a white with silver glitter that was then fused to a thin fusible interfacing. The one upper right is the first I played with, placing the flowers and butterflies… I decided it would be much easier to stitch the vines first, then add the flowers and butterflies after that.

Beginning Stitching

I used a green variegated thread to stitch around the edges of the vines and leaves, and added little curly tendrils to the pea pod.

Ready to fuse to inside

After the green stitching was  done, I switched to clear thread around the tulips, butterflies and flowers. The little quilts were now ready to fuse onto the inside that would connect the two little “quilts”.

Cooled Under Pressure

This photo above, shows the stitched “2″ sides after they have been fused to the other side of the inside printed card stock. Once both little quilts were fused to the outside of the inside, the pieces were folded and cooled under a weight to keep them flat. When fabric is fused to card stock, things tend to want to curl, so the weight flattens things while they are hot, then when cool they will stay fairly flat.

Outsides of the Double-Sided Cards

This photo shows most of the cards after they had cooled. To finish the edges, I dabbed them with a stamp pad with purple ink. You can see Two of the cards standing up like little sign boards. I did find I had a problem with the ink. After I put it on, it seemed to want to rub off, so I ended up brushing on some gel medium to seal it.

Cosmos and Peas Finished

Here is one of the Cosmos, 2, Butterflies and Peas sides… you can see a bit of the inside printed card stock. If you look really close, you can even see the two little peas made from the paint tucked into a fold in the pod.

Two Tulips

This photo shows the Tulip side of one of the cards…

Two Many Twos Finished Group

This photo shows a group of the finished cards, with some showing the Tulip side, and some showing the Two Peas and more side, along with one open to show the inside of a finished card. “Two May Two’s” were then packaged in archival art card sleeves and sent to their new owners.  I really never thought I would end up with so many ideas for what one would think was a simple theme….  If you would like to see what other members created for this round as well as others (if you want to do a bit more scrolling) see the Arts in the Cards Blog where each of us have posted our creations.

Big Shot Machine with First Cut

This is the new tool I have been playing with that led to many of my ideas. It was one of the vine cuts shown in the photo above with the machine. The die shown is the first one I got with the machine. I also got a couple others, but this was the one that I have played with the most. I wanted to see just how many different designs I could make using  just one die. The die cutting machine is designed for scrapbooking and paper arts to cut paper and other similar art materials. I had seen a video online showing one being used for cutting fabric, and that got the wheels turning. I do a lot of fusible applique and have been doing more with tiny pieces and even with my straight handled scissors, cutting is hard on my hands and takes a lot of time.

2 Motifs

This photo above shows two full motifs that were cut with the die. I cut two pieces of Wonder Under backed fabric right sides together using the whole design on the die. Most of the designs I have come up with have just used parts of the motif with fabric folded in different ways.

Die Play on Dyed Fabric

This is a photo of one of the first pieces I played with. I took a 6″ square of white fabric, folded into quarters on the diagonal, run through the machine just using part of the die design. I pulled the vine pieces out of the square and fused them on the outside of it, giving me what you see here.


Vine Heart 5″x7.5″ SOLD

This little piece above is one of the little experiments I began with and finished. This is 5″x7.5″ in size, and I arranged the vines to make the heart shape and swirl below. I began quilting with green thread on the vines and added little tendrils, then I added more quilting with the clear thread to fill things in. This ended up going to a new home after I showed it at my local quilt guild’s show and tell…. My first sale of the year!

I now have some more dies to play and see what new things I can come up with. So far this little tool has been helping me to get the old creative juices flowing again. If you are interested, I have been adding photos to a Die Cutting Album  on my Facebook profile page.  I have two more little pieces finished using die cut fabric and have photos there. I plan to get any new pieces listed in my ArtFire Art Quilt Shop also.  If all goes well, I hope to add new posts more often this year.

Playing in the Studio Again!

Tuesday, October 11th, 2011

Well, I’m slowly getting back to posting here more regularly. Since the last post I ended up doing Waaayyyy more organizing in the studio than I had planned to, made my cards for the Arts in the Cards exchange, got behind with my weekly journals and caught back up again. In the middle of everything else I even got a little bit started toward cleaning up one of the biggest “eyesores” in the landscape around here.

Neat Shelves!

This photo above shows my shelves after I emptied every one of the “cubbies”, sorted and organized my fabrics. I have mostly my painted and dyed fabrics on the shelves now and will be selling off and storing what I keep of most of the commercial fabrics on the shelves in the office. Since my pot of pencils, pens, etc. seems to always be in the way on my table, I left a couple of the spaces free of fabric to keep things off the table.


Computer Parts

Once I got the cutting table cleared of debris again, I was able to get some of my projects done. The AIC exchange theme this round was Hardware…. Perfect, there is a lot of that around this place. My first thought was to see if I could find some little bits left from various computers that are stored in boxes… I soon found that nothing was small enough for an art card (and I wasn’t really into taking things apart… I leave that to my guys), I decided that I would use a photo of some of the parts as the background. I took a bunch of photos, and decided on a pretty simple layout.

Hardware Printed and Stitched Canvas

A photo of a circuit board of some kind? and one of part of some sort of hub-like purple thing (yea, I’m not geeky enough to know what is what) worked great together giving the feeling of sky and grass. You know me…. flowers always seem to pop up in my art.  I printed the photo onto cotton fabric, then fused that to some canvas I had to give some stability. I knew I was going to have flowers, and after playing with my card (the 7th one that included a printing boo boo) I had an idea of where I wanted stems and leaves that I stitched with silver metallic thread.

Painting Washers

On a trip with Ken to Lowes last week, I did wander down the hardware isle and check out all the little fun goodies they had. I only bought a package of little copper coated nails. While looking for the computer parts, I had to walk past Ken’s woodworking and hardware stuff. I found some of the cute little lock washers that look like gears on their insides. He had lots of each size, so I “borrowed” one each of 3 sizes for each of the 7 cards I needed to make. I also picked out some small “regular” looking lock washers (again… I’m no hardware expert..:). Since my little nails were copper coated, i pulled out my Lumiere paint and turned the plain washers into copper colored ones. Working with those tiny little pieces, I got as much paint on my fingers as the washers.

Hardware Card Wet Glue

I made two stems for each card out of copper and silver colored wire, and stitched them onto the bases (I only hit the wire once even with  my terrible eyes). After laying out the washers and nails, I realized things looked too sparse, so I pulled out some tiny grommets for paper crafting that I had collected years ago, and decided since computer parts were used for the background, I cut up an old software CD to make a couple more “flowers” for each card. The photo above shows one card while the glue was still wet. The grommets were attached using a hammer and grommet tool, and everything else was glued on with gel medium. You’d think I would have learned after painting the washers that working so tiny, I should have found a pair of tweezers to help me out. Instead, I ended up getting as much glue on my fingers and under my nails as got on what was being attached to the cards.  Once dry overnight, I printed up backs for the cards using more computer part photos, printed on a Radiant Gloss photo paper. The backs came out nice and shimmery, but the photo paper bubbled a bit with the heat of the iron when I fused it to the backs… Ahhhh another lesson learned.

Hardware Cards Set of 6

Above is the photo of the finished cards ready for mailing. There are 7 in this trade, so the 6 “good” ones get sent out, and the “guinea pig” one is mine to keep… Not exactly like these… it has all the trial and error boo boos on it :)

Week 5 Journal WIP

While doing my sorting and organizing in the studio, I found a bunch of unfinished projects dating back many years. As with the previous week’s journal quilt, I am using the smaller unfinished pieces for my weekly journal quilts. This was from my days of selling at art and craft shows, when I would work in batches. I would make up the bases of the pieces and then add the applique and quilting. This already had a few pieces fused on for fall leaves, so I finished it up with a tree.

Coloring Fabric

My tree needed more bright leaves, so I decided to color up some just for this one. The fabric is a leftover Wonder Under backed scrap from my placemat making days (that’s why the wierd shape). This piece is a white leaf print on slightly ivory fabric. I began by scribbling with my Inktense Blocks in orange, yellow, red, and a touch of mossy green.

Coloring Fabric Adding Water

I am still amazed at what happens when water is added over the Inktense blocks or pencil.

Coloring Fabric 1

The colors were too light and I wanted a bit of shimmer, so I pulled out the metallic paints. This was a gold color and looked too brown to start, so I scribbled with the Inktense blocks on the parchment near my thinned gold paint.

Mixing Paint

Look what happened when I pulled the Inktense pigment into the metallic paint… much nicer color.

Coloring Fabric 2

I liked the fabric a bit better after adding the mixed paint, but it still needed more, so I later added some more shades of metallic paints that I had on hand.

Week 5 Tree and Grass

While the paint dried, I turned back to the quilt itself. I cut out and fused on the tree trunk and branches. Then I added the stitched grass using one of my variegated threads in shades of green. I just did a sweeping patch of the grass to give the piece some movement.

Tree Texture and Outer Quilting Done

With the grass done, I needed to figure out what to do next. I added texture to the tree trunk with yarn couched on and added more branches by free motion stitching using a zig-zag stitch. This gave me heavier lines than straight FMQ would and it was fun to see how it turned out! I knew that because of the dense stitching in the grass and tree, I needed to keep the rest of the stitching and quilting dense, too. I used a pale variegated blue thread for the sky-like background, then I used a nearly matching thread in the green border and did a lot of tiny leaves vining around in the border. I also added more grass-like stitching along the bottom that would blend into the border. I fused a few fabric bits for fallen leaves and stitched the grass over most of them.

Week 5 Falling Leaves

Once all the background quilting was done, I added the rest of the leaf fabric bits (some from a bright orange section of one of my dyed fabrics), and then stitched over them with a variegated thread in shades of orange through deep rust. I did this stitching to mimic the angled shapes I cut for the leaves.  After steaming it out, “Falling Leaves” is just about 8″x10″. This is the firs one I think is “sale worthy” (others may have differing opinions :) so I decided to list “Falling Leaves” for sale in my Art Quilt Shop on ArtFire. The link will take you to the listing if interested, where there are more detail shots.

Once I had my week 5 journal quilt done, week 6 was due, so I pulled out another WIP and finished that piece, too.

Week 6 WIP

This was a piece I started back in 2006 on the trip to Houston’s Quilt Festival as something to keep me  busy for at least part of 3 days in a car. I had fused the sunprints to the batting with the white accent fabric, then I hand couched the bulky yarn over the seams. I never got any farther with this until now.

Week 6 Detail

Since I have been wanting to play with my threads and stitching during this journal project, I decided to try something a bit different from what I normally would have done. I began with my “usual” vine quilting in the white areas using a pastel variegated thread that has all the colors of the sunprints. The stitching was pretty pale in color so I added more over the top with a purple metallic thread. Some of the yarn is stitched with a rosy purple metallic embroidery thread, so I thought I would add some metallic to the  vines.

Week 6 Sunprints

I didn’t do much new with the quilting in the sunprints themselves… I still like that the clear thread adds just enough texture to accent the prints without overpowering them like other threads I have tried do. To finish this off, I bound the edges with the same bulky black yarn with the colors in it that was used on the seams.  A lot accomplished in the studio in the past weeks! Finally!

Back of Workshop Mess

And to let you know that I have not totally been ignoring the gardens, here are a few photos. This one shows one of the worst “eyesores” in view of my studio’s North window. You can barely see the singlewide trailer that is a bit narrower than the one we live in that Ken is finally using as his woodworking shop. It is also where I make the wreaths in November and December. It is barely seen through the overgrown, falling down and obnoxious Sumac trees. The ones on the right of the photo fell down many years ago and are still lying there… I have had to mow around them and it’s not fun. In one way I hate to totally clear everything from here because the birds really love this mess. I plan to plant many of my baby trees in this area to have a neater and prettier bird sanctuary area. I have one huge pile of dead stuff ready to burn, and more is on today’s schedule to be  hacked and burned, too.

Salvia "Monsters"

I am also still learning my new camera… Here is a closeup of a couple florets of the Salvia Black and Blue… Probably the only Salvia I really like (most of them have red flowers). This photo came out pretty neat, with the florets looking like open mouths of some sort of monsters. The color even is pretty true without playing in photoshop!

Puff Balls and Moss on Stump

Thanks to Vladdi and Roxie chasing through the woods, I found this moss and puffballs on an old rotting stump. Vladdi and I were looking for Roxie who he left behind… She finally came slowly through the woods by the time we got too far.

Woods View

The last photo for this post… A shot of the trees in the woods. Lots of young trees, mostly Green Ash and Black Walnuts…. But a few more Sugar Maples are getting some size on them… They don’t seem to like the Walnuts… We usually get tons of seedlings, but very few live more than a couple years. There aren’t many Walnuts in the North end of the woods, and we are finally seeing some Fall color in that direction!  Walnuts and Ash aren’t great for color… A little yellow for a short time.  The Sugar Maples are the best! (in my opinion).

A New Beginning?

Tuesday, September 13th, 2011

My last post was 3 weeks ago, and the perennials in the gardens are beginning to look a bit shabby… It didn’t help that we had nearly a week with no sun and 4 straight days with rain… One of them with 6.5″ in less than 24 hours….

Soggy Hibiscus

The above photo shows the Pink Hibiscus after one day of rain on Sept. 6…

Back Yard Rivers before digging

September 7th- The Mound Garden river was flowing again…. This time, I had a ditch dug in the dog yard to divert some water to the woods… It took a lot of water (near the back fence), but there was more water going through the Mound Garden than in any previous storms of the year….

River outside Studio

This photo shows the river as it passed in front of my studio window… The water running by the propane tank headed straight for my studio wall and ran right around it, then flooded much of the dog yard… Poor pups! They didn’t know whether they wanted to go out to do their business or not… Some water had puddled under my sewing machine and the towel I keep along the wall was soaked, so some re-routing of the river was required.

Back Yard rivers after digging

During a slower rain shower, I was able to dig the ditch in front of my studio deeper and also dug the ditch to the woods deeper to give the water a place to go. As you can see in this photo above, there is a lot of water in the ditch in the dog yard, and very little in the garden… That helped for a while, but a later heavy downpour caused breaks and overflows in the ditches, so I had to choose another break in the rain to do more digging…

Van in driveway

We usually park the mini van in the lower parking area, but we had gotten groceries the last time it was driven, so it was parked and left in this part of the driveway… The water was getting really high, and when I went to move it before my second digging session, the wheels were already partly buried in the gravel that had washed from the upper part of the driveway.

Flooded Dog Yard again

This was one of those helpless feeling moments…. The latest heavy downpour had overflowed the banks of the ditches and broken part of one of my new levees (left side of pic, inside the dog yard).  When I got out there later to do damage control, I found that grass, leaves and other debris as well as LOTS of driveway gravel had plugged the wire of the fence and caused water to stand everywhere and return even worse to the mound garden.

Dog Yard after Flood

Sept. 8th, after the bulk of the rain had fallen, this is what the dog yard looked like… The two piles of mud and gravel along the back fence is what I dug out away from the fence, trying to get the water to go under instead of through it. I had 3 areas where water was flowing under the fence, and the middle one clogged again…. The gravel came from far up the driveway….

Culvert by Upper Parking Area

This photo shows some of the deep gullies formed in the driveway… I am really glad I added the big rocks by the pipe before the storm… This culvert has been washed out too many times this year.  There was still a big ditch from the previous storm, so I filled in much of it with rocks…. Some stayed! It’s amazing how much damage water just from 1/4 mile above us could do…. all that water ended up heading to the Susquehanna after collecting more along it’s path…. We were very lucky living this high up. The river flooding was near or above record levels with many homes and businesses being affected.

Wet Mini Rose

Here is a lonely bloom on the mini Rose bush….

Harry is still trying to grow!

“Poor Harry” seemed to like all the water…. He seemed to put out some pretty good new shoots!  The poor thing has been munched on much of the summer… it seems every time he has put out new growth, it has been eaten off. This time I gave him a douse of dear repellent before he became deer snack again.

And speaking of “Poor Harry” (a Harry Lauder’s Walking stick bush), he was the inspiration for my latest batch of art cards for my trade group.

Harry in the Petunias

The full view of Harry shows the dead branches that he was left with after being mauled by deer. I liked the shape of these branches, so I left them even though they are dead. A bit of “sculpture” in the garden. I took this photo and removed the background in photoshop to  use for the art cards.

Balance ATC's Printed

The theme for this trade was “Balance”… My gardens have been about the only thing to give ma any balance to my life lately, and Harry makes a pretty balanced “sculpture” in the garden, so he was to be the star. I began by fusing random scraps of fusible backed fabrics to parchment paper until I had  just a bit larger than a sheet of paper. I wanted to print Harry’s picture on this fused background, so I painted over the fabrics with titanium white to soften the colors, and a bit of gel gloss to seal and snaggy edges.  I then set up the document to print and it  worked! No Jams!  The above photo shows the printed fabric  base.

Balance Pair started

This photo shows two of the cards after they were cut to size and Inktense pencil was added for the Petunias in the garden. I had only dampened the pencil for Harry’s leaves, and not the flowers yet.

"Poor Harry" Balance Cards

Above are four of the finished cards… See how much more vibrant the colors from the Inktense pencils are after I painted over them with very dilute gel medium. I added some more deep shading on Harry with the pencils and thicker gel gloss to give him a little shine like he has in real life.  I finished these cards the day before the heaviest rain hit, and they got in the mail just in time… I’m not sure how many days we were without mail after that….

Studio Window Garden

Since I have been pretty creatively blocked lately, I have been trying different things to get things moving again…. A member of the Quiltart list was about to turn 49 a few weeks ago and decided she would make a little journal quilt each week during her 50th year. She invited others to join her, and since I just turned 50 last month, I decided it might be something to get me back into creating.  For the first piece, I used the photo of the view of the garden I see from my studio window when sitting at my machine.

Week 1 Sept. 4

The “due date” for the first piece was Sept. 4th…. Thankfully the rules for the group are pretty flexible, and I only had part of the piece fused together by then, but for me that was better than I had done in a long time. Yesterday, I finally finished it…. It took a while to do the quilting with all the thread color changes I did, but Free Motion Quilting seems to be like riding a bike… I was a little rusty at first, but moved along pretty quickly. The photo above shows the finished piece!

Before I started quilting week one’s quilt, I worked on the second piece.

Week 2 Beginning with Photo

Since week two included the storm, I just had to use a part of one of the photos of the water flowing through my Mound Garden.  Above is the photo I used with the beginning of the quilt before quilting.

Week 2 Sept. 12

Here is the finished piece for week two. I played with different shades of beige and brown threads for the muddy water and gravel in the quilting. The main fabric in the middle of the piece is a bit of a small piece of a batik I had that gave the feel of much of the upper part of the garden. The lower part of the garden is a piece of my pale hand dyed fabric with Inktense pencil used to add the green for the leaves of the plants. I used little touches of titanium white paint for the Phlox and Echinacea flowers, and quilting with a variegated bright pinks thread makes the Vinca flowers.

While these two little pieces aren’t a lot, I really hope they will be the beginning of my creative mojo returning…. Maybe I’ll even finish a quilt that I started nearly 1 1/2 years ago.  I’ll take any creative bursts I can get!!

Playing with Inktense Blocks Part 2

Thursday, March 17th, 2011

As promised, here is part 2 of my experimenting with Derwent Pencils New Inktense Blocks.  In the previous post, I showed a Delphinium flower stem colored with the blocks.

Delphinium Flower Dry

This is the Delphinium on white cotton fabric after it finished drying. The color lightened a tiny bit, but is still nice and bright.

Inktense on Paper

Before I played with the blocks on fabric, I did a little on a sketchbook page. The photo above shows a few Delphinium florets that I began with. The upper right and middle fully open florets were done completely with the Inktense Pencils. The other florets were outlined with the pencil, then the blocks were used to fill in the petals with the color. I used the same Deep Indigo and Sea Blue with tiny touches of Fuchsia. I added all the colors dry, then dampened with my blender pen. There is not much difference, but the florets done only in pencil show more “sketchy lines”.  You can see the direction I drew on with the blocks and used the blender pen, but there aren’t the distinctive pencil lines. (A more experienced pencil artist could probably get a less “sketchy” look with the pencils, but the blocks made things very easy for a relative beginner like  me.) You might be able to just see the faint, still dry Fuchsia color I added to the background by using a long side of the block with very little pressure. I was doing an experiment before doing the background on the fabric piece.

Water Over Dry Inktense

The next experiment I did was over part of the drawing on the fabric. I wanted to do a wash of color for the background, so I added some plain water with a brush over a small section to see what would happen. With fabric, colors will run very easily. There was very little bleeding of the blue into the white background, and all I did with the pencil and blocks was to wet it with the blender pen. (Just ignore that funky green below the flower, the fabric  was a “printing failure”… the paper backed fabric jammed in my printer, leaving just a strip of the image and a few black streaks here and there along the sides.  Mistakes on fabric are just opportunities to do something else with it.)

Dry Cotton

While the test area dried on the first fabric piece, I decided to play with another piece of fabric… Here is the white cotton I began with.

Wet Cotton

The fabric sprayed with water and smoothed onto an acrylic sheet to begin like I would when painting my fabrics with acrylic paint.

Adding Sea Blue

The Sea Blue block rubbed over the wet fabric…. I had a sky of sorts in mind….

More Colors Added

I then did some passes with the Fuchsia block and more of the Sea Blue, hoping to end up with some lavenders when the colors mixed. I added the greens available in the 12 block tin to see if I could get some mountains….. None of the greens are near what I usually use, so some over-mixing will be needed. This is a “guinea pig” anyway, so a perfect place to play….

Water Brushed Over Colors

Above is what the piece looked like after I used a very wet half inch brush over the Inktense colors. There is also a nice brown in the set that I used in some of the lower edge areas. By mixing the Apple Green and Leaf Green in different ways, I got colors more to my liking. I think I also added Apple Green over some of the Teal Green that in the beginning really looked out of place.

Colors Blended More

Here is what I ended up with after a bit more blending and adding a tiny bit of the Sun Yellow to the horizon. I did a bit too much blending in some areas and started making “mud”, but like with the paints I usually use, I never know what the dry end result will be…..
This morning, this is what the dried fabric looks like. The areas that were too bright dulled down a bit, and I like the look better. I am not sure if this will become a finished piece in it’s entirety, but if not, it will work nicely for part of a book cover or something else. I LOVE how easy it was to do this…. I didn’t need to pull out my paints and brushes that I haven’t had out in a while. All I needed was the fabric, acrylic  sheet, Inktense Blocks, a spray bottle, little cup and  a brush. Very little clean-up needed. This will be super for coloring up small pieces of fabric needed for various projects.

Background 1 Added

Back to the Delphinium piece…. The test area dried with next to no bleeding, so the next step was to add a light bit of the Fuchsia block used on it’s side. I only wanted a wash of color,so kept the pressure on the block very light. You can see a couple of streaks at odd angles due to some extra “stuff” under the fabric that was on my work table…. A clear table is hard to keep in my studio.

Water on Part

This photo above, shows the top half of the piece after I brushed over it with a sloppy wet brush. I had to take the paper backing off the fabric because the paper was curling badly…. another lesson learned…. The pink color was very light, except where a corner of the block rubbed harder, or whatever was underneath caused a deeper streak. The water was brushed over everything, even the previously colored flowers.

Fuchsia Used with Water for More Color

I wanted a little more color, so I used my brush on the block of Fuchsia to pull color into my little cup with a little water to make some liquid color to add here and there.

More Colors Added over Wet

Here is the piece with a little bit of Sea Blue and Teal Green added to give more interest to the background. This photo was taken before I did more wet brushing over the new colors.

Fabric Dry Adding More Flowers

This photo above shows the fabric dry again, you can see how there is just a bit of mottled color for the background. I decided to add another flower stem next to the first one.  This one is going to be lighter, using mostly Bright Blue. I began as with the first one with the pencil for the outlines.

Adding Leaves and Stem

I drew in the leaves using my Ionian Green Inktense Pencil for the outlines, and filled in with the Apple Green and Leaf Green blocks mixed to get the shade I wanted. The photo above shows the leaves still dry.

One Leaf Wet

This photo above shows how the colors change with the addition of water. The right leaf has been partially gone over with the blender pen. With a bit of “scrubbing” with the pen, I was able to blend the two shades of green blocks.

New Flower Done Damp

This photo shows the new flower stem after the petals were filled in with color and dampened. I mixed a little of the Deep Indigo with the Sea Blue and tiny touches of Fuchsia on the petals while the pencil was dry.

Done Dry

Ta-Daaa! Here is the piece fully dry this morning. This is destined to be chopped up into ATC’s for my exchange group. I was amazed how little color bleeding I got from the deep blue flowers when I brushed the water over them to do the background. I did blot a couple of spots, and found a few areas that some of the color transferred to my paper towel, but most of the previously dampened and dried color stayed in place. I will probably play with covering the fabric with different acrylic mediums to see what happens. I love to play with the pearlescent, and wonder what a little gloss over the top will do…. More play time needed :)

Hopefully I will have another update tomorrow or the day after…. An errand running afternoon is ahead, so I have no idea what the body is going  to do when I get back home.

Playing with Inktense Blocks Part 1

Tuesday, March 15th, 2011

I was amazed a while ago when I left a comment on the Facebook page of Derwent Pencils for a chance to win a tin of their brand new Inktense Blocks, and WON!! I was one of five winners, and my new tin of fun arrived over the weekend.

Inktense Blocks Tin

I spent the weekend with a nasty fibro flare, so I didn’t do anything with them until yesterday. I got a design drawn out on some cotton fabric backed with Wonder Under with the paper backing, making it easier to draw  on…. Today, Tuesday, I finally cracked open the plastic seal on the Inktense Blocks.

Inktense Blocks Opened

This month’s theme for the “Arts in the Cards” ATC group is Indigo… anything goes that uses any shade of blue. My first thought was Delphiniums, of course…. I love them and they come in so many great shades of blue. I first drew (actually traced an enlarged drawing) a Delphinium stem lightly in pencil, then outlined the flowers with my Deep Indigo Inktense Pencil. After outlining, I went over the Inktense with something I have had lurking in my supply drawer for well over a year….

Blender Pen with Inktense

In the above photo to the right of the colored pencil is what I found works super for wetting the Inktense pencil, causes minimal bleeding on the fabric, and is so much easier for me to use than a tiny paintbrush with water. I bought a set of blender pens at a Stampin’ Up! party for Scrapbooking. I first intended to use the pens with my water soluble wax pastels (I also bought colors of those I didn’t have yet that were demonstrated that night). Due to the creative block problem, I had not even opened up the box of  3 pens I bought until now.

Blender Pen with Inktense Pencil

As you can see in this photo above, the blender pen has a nice sharp tip and is easy to control. You can see how the color of the Inktense pencil intensifies when water is added to it. My first attempt at using my pencils with the Chickadees was a real learning experience. It took a lot of time to reload the brush with water and(or) medium. The blender pen fed a constant supply of water to the tip…. It was just like tracing over the pencil with a felt tip pen.

Blender Pen Over Inktense Pencil Outlines

This photo shows what a section of the Delphinium florets looked like after they were outlined with the Inktense pencil and then dampened with the blender pen. I finished all of the outlines, then allowed the fabric to dry. The Inktense pigments are permanent after they have been totally dissolved with water, then dried.

Inktense Blocks Sample Marks

Once the outlines were dry, the fun began with the Inktense Blocks! The new blocks are the solid pigment, without the outer wood of the pencils. They look like, and can be used like pastels to add color to a project. I made a few sample marks to get a feel for how the blocks would work. I began with a swipe with the full end of a block, then drew a line using a corner of the block. The block used in the above photo was the Deep Indigo, the first wide one was pressed harder than the second wide one. It looks nearly black when dry, and the first marks I made left a few crumbles as the edge was smoothed up. I brushed off those loose bits into a little cup.  I will show what I did with the “crumbles” later….

Inktense Blocks Added On Fabric

I used the end of the block to fill in the petals with color. I didn’t add too much to start, so I could test the waters, so to speak.

Adding Water to Inktense

You can see what a difference the water makes with the Inktense pigments. The first lines that I colored and dried stayed in place nicely, and it did not take too long to really brighten up the flowers. The blocks are great for coloring larger areas without getting the “scribble” lines I always end up with using the pencils. Using the blocks on cotton fabric is a little more challenging than smooth paper. The weave of the fabric grabs the pigment from the blocks, causing some streaks and more color to be laid down where the backing paper had wrinkles, too. “Scrubbing” a bit with the blender pen helped to move the color to where I wanted it.

Blender Pen on Inktense Block

Another way to use the Inktense Blocks is to treat them as you would a solid watercolor paint. I wanted to add a bit of purple to the flowers, so I used the other tip of the blender pen (each pen has 2 tips) like a paint brush to pick up some of the pigment to accent the flower petals.

Adding Fuchsia with Pen

The above photo shows the Fuchsia Inktense added to a floret. I had already added a bit of Sea Blue over the Deep Indigo to vary the color in the petals more like they are in nature. The first streak or two of the Fuchsia were a bit intense, but with a bit of work I was able to blend them in a bit.

Two Florets Colored

This photo above shows two of the florets fully dampened with all 3 colors used. The rest of the florets have just been colored in with the dry blues, ready for water.

Inktense Crumbs in Cup

Ahhhh…. back to the crumbs…..  I brushed the crumbles into a bottle cap and dropped a bit of water onto them. This is another way the Inktense Blocks can be used…. They can be grated and mixed with water to make a liquid watercolor paint. To play with my flowers, I just added a drop or two at a time and used the blender pen as my brush.

Delphiniums Colored

The final photo for this post…. I used the crumbs mixed with water to add more color to the petals. There were crumbs of both shades of blue, so that helped to even out some of the streaking I ended up with. The upper florets were still damp when I took the photo and looked a bit deeper than they ended up. The lower ones that are quite light hadn’t been painted over with the liquid color yet. I will let this dry over night and see what I decide to play with for the background… I am not sure what color I will try yet….. To color in the large background area, the blocks can be used along the long edges to quickly lay down a lot of color. I am toying with the idea of using a very light touch of the Fuchsia for a pale pink background that will add a cast of pink over the flowers, too if I just go over the whole thing with the color… I plan to add a bit of pearlescent paint to the floret centers, so losing the white there will not be a problem…. Tomorrow I will try to have another update….

More Playing with Inktense Pencils

Tuesday, January 25th, 2011

After finishing my little Chickadees, I decided I needed to see what else I could do with my Inktense colored pencils. I sold out of my covered mini photo albums, or brag books in early December, and really need to get more made. The covers were made using sunprinted fabric or photo transfers along with whatever dyed or painted fabric I thought looked good with the focus piece.

Brag book- Set of 4

This photo above shows a little group of the books I finished last fall. I try to use my best sunprints for the focus fabrics on the fronts of the covers, but I have LOTS of prints that just don’t have that WOW factor…. They are either not very sharp, or otherwise pretty boring.

Cosmos Sunprint

This photo shows one of the “wishy-washy” sunprints. The fern printed OK, but the Cosmos flowers are pretty blurry. Also, there isn’t much contrast in the piece of fabric. I could jazz it up with stitching and thread, but decided this was one good “victim” to try my pencils on.

Cosmos with Pencil

Above is another sunprint from a similar batch after I outlined the flowers and centers with the Inktnse pencils. I used Fuchsia for the petals, and Sun Yellow for the centers. I lightly dampened the fabric just were I wanted to add color with water, and added the pencil. Since I love all things sparkly, I decided to see what happened if I used my iridescent medium over the pencil to finish things. I used very watered down medium over the flowers, then added some thicker pearl to the flower centers, dotted over the yellow. With the water just where I wanted the color, and careful placement of the medium, I got pretty sharp lines.

Maple Sunprints

This is a sunprint of a couple of Maple leaves on nearly black paint.

Penciled Maples

This photo above doesn’t do justice to these leaves, but here is what happened when I drew the veins in the Maple leaf sunprints done on black. I started by just adding water over the pencil, but since I was playing with sparkle, I decided to add some to these… The effect gives an impression of the sun shimmering off snow on a very cold day. I kept the pearlescent medium just in the leaf areas. The actual look is much softer than the photo.

Ginkgo Sunprint

Here is one of my Ginkgo leaf sunprints on black…..

Ginkgo Cover

I tried a similar idea with the Ginkgo sunprints. I added Fuschia colored veins with the pencil, then used the pearlescent medium that wasn’t as watered down as on the Maples. The thicker layer of paint nearly covers the color completely. The camera is also picking up a lot of shine…. in real life, at different angles, you see varying amounts of the pencil color.

Fern with Flowers

Here is what I ended up with when I dipped the Violet pencil in water, then scribbled over a small flower stamp I have. The stamp gave a faint outline that I then traced over to get more color. I again used very watered down pearlescent medium over the pencil, then thick medium for the centers. The flower centers are sparkly even though they look white here.

Album Covers in Progress

This photo shows some more of the sunprints I played with. A  couple more on black, where I added color, and other sunprints I added little bits of color to. I have used some of last Spring’s dyed fabric for the remainder of each cover. The pieces used here are pretty bright and pull colors from the pencil I added. It will be fun to see how these look when I get them finished.

One thing I discovered while starting these, is that the little sketch book I made and used for my bird sketches will fit just right in one of these covers. I didn’t really pay attention to the size of the book I was making- I just cut the heavy drawing paper I had and folded, but the pages ended up being 4″x6″… just the size of the photos that fit in the albums that go in these covers.

So far this year is beginning much more creatively than the past couple…. Now to get these albums  finished so I can list them in my Andrus Gardens Studio on ArtFire.

Water Road Continued….

Monday, May 10th, 2010

Due to “technical difficulties” I had to rebuild the last post, and am finally getting the rest of what I found the other day along Water Road. If not for those Azaleas, I may never have known some of these  little treasures existed right under my nose….

Wild Blueberry Blooms

During my wandering, I noticed what looked like small Azalea plants closer to the road. Upon closer inspection, the leaves were too small and not just right for Azalea leaves. They almost looked like Blueberry leaves, but I had never seen those here before…. As the photo above shows, they are definitely Wild Blueberries! They may have  been under my nose all the time and I just looked over them, or this may be the first year they have bloomed…. Actually, around here they are called Huckleberries if they are found growing wild. They have smaller berries than the cultivated ones, but the flavor is wonderful. It’s hard to tell from the photo, but the blooms are about 1/4 inch long…. very tiny.

Solomon's Seal

I almost missed this, too… A medium growing Solomon’s Seal. I had gotten into the van and saw these out the passenger window, so had to get out again to get photos. These flowers aren’t quite fully open… They aren’t very showy, but the plants usually spread nicely. I have a variegated leaved one in my woodland garden…. I haven’t seen them come up yet… maybe I better take another walk in my own gardens!

Pussy's Toes Flowers

There were lots of these Pussy’s Toes blooming on the steepest parts of the roadside. They tend to like more harsh conditions to grow in. The little flowers on these are on 6 inch tall stems, with little fuzzy  gray-green leaves.

Dogwood

It is pretty tricky to get photos of the wild Dogwood flowers. Most of the trees are way down the steep bank on one side of the road, or high on the upper bank of the road. This little tree wasn’t too far up, but the wind was blowing, so many tries were fuzzy. (I love my little digital camera…. just erase the bad ones:) I was trying to get a photo of some of the flowers from their tops, but I’m not tall enough and the wind didn’t want to blow them just when I wanted. This year, they seem to be ahead of most years, just about past peak.

Cinquefoil

I should have tried to get a finger into this photo to show how tiny the Cinquefoil flower is. The tree leaves may put things into perspective a bit. This flower is no more than about half an inch across. Plants growing in better conditions will have slightly larger flowers, and plant is mostly considered a weed by me. Pretty cute here.

Tall Trees

I was trying to show what it is like to walk along this roadway, with the tall trees growing up on a high bank, making them appear even taller. The sky was a perfect blue for the background. This is a beautiful stretch of road, and I feel so lucky to live where I do every time I drive down it.

Fiddleheads

From the sky, to the ground again….. There are many varieties of ferns growing, and this one is just beginning to unfurl it’s leaves with lots of little Fiddleheads showing.

Anemonella

I discovered these little Anemonella flowers last year, and I think there are even more of them this year. I have a hard time getting the camera to focus on the flowers, not the leaves or background, so this is the best photo I got. Another trip may be needed if the wind ever stops and the temps go up a little.

Big Rock

This is  one of those things that amazes me…. Here is a huge rock, and there are numerous plants growing on the top of it just in whatever has fallen on the top and accumulated there. The photo doesn’t really show well, but the rock sits out by itself. A little rocky soil has tumbled off the bank onto part of it, but most is just old leaves, sticks and whatever else happened to fall there. The poor plants must struggle a lot for moisture in the summer, with such a thin layer of “stuff” to grow in…. Nature at it’s best! This is the last of the photos from that walk along the road…. There will be more as the Mountain Laurel get nearer to blooming.

Single White Peony

This beauty is something I have been wanting to acquire for many years… A Single flowered White Peony!  I found this just in bud at a Lowes on the way home from my gram’s. It just started opening these gorgeous Lotus-like flowers. It is in the house right now, due to the gusty winds that kept blowing it over, until I decide it’s place of honor in the front door garden. The single Peony will hold it’s flowers longer because the first rain shower doesn’t fill them with water and flop them to the ground.

WIP Peek

Here is a little peek at what is happening with some of the photos I have been taking…. I am making a batch of postcards for an exchange group, and hope to have some extras that  I will be able to list for sale, too.  I also need to get my larger WIP to the machine and start adding some stitching to see where it will end up…. I have an idea what I will do, but many pieces seem to decide they want something different than I first thought…. Time will tell!

Quilt Retreat 2010!

Tuesday, March 16th, 2010

In between the first snow of February and the big snow storm at the end of the month, I escaped with nearly 40 other quilters for the Endless Mountains Quilt Guild Retreat at Watson Homestead in Campbell, NY. The retreat center we go to is a great location for the retreat. We had large rooms to set up our machines and more to sew and hang out with each other, all our meals were prepared for us, and our dorm rooms were in the same building. Four days and 3 nights of fun, and I actually felt like the creative juices were beginning to flow again!

Mud on the Wall

Here, I just stuck photos and chunks of fabrics on the design wall to give me an idea of what I wanted to do for my new Water Road inspired piece. This was before I took it off the wall to pack for the retreat.

Retreat Main Room

This is the room we we spent most of our time in during the retreat. Lots of different projects were being worked on. The following photos show the progress of the piece I began at home.

Mud on the Wall 2

Mud on the Wall 3

Mud on the Wall Not so Muddy

The last photo shows the piece after I got home and have it almost ready for fusing to batting for stitching. Finally some progress on a piece inspired by mud and rocks.

Wisteria Vines being Stitched

What I worked on when taking a break from the Water Road piece. This is one of the stone walls I began while at my grandmother’s last fall. The vines are made of various yarns and torn strips of fabrics. They are then stitched on with a free motion zig-zag and variegated threads.

Wisteria Vine Stitching 2

A closeup showing the vines in more detail.

Wisteria Almost Done

Flowers and leaves fused on then stitched.
By the time the retreat was over, I had the binding done on this as well as another tiny one done, too. Finally some progress!!

Playing With Mud and Rocks Again

Friday, January 29th, 2010

Actually I am playing with paint on fabric to resemble mud, rocks, moss, ferns and flowers for a new art quilt I am working on. I have had the idea for this piece in the back of my head for a long time…. You know the kind…. an idea that keeps peeking out to say it wants to be done, but every time you try to put idea to fabric, things don’t work right, and the idea gets crammed back into the recesses of the mind until it decides to pop out again…. Finally this idea has actually gotten on the design wall, and is progressing.

Art Quilt "Mountain Laurel and Ferns" by Sue Andrus, Andrus Gardens

"Mountain Laurel and Ferns"

“Mountain Laurel and Ferns” was one of the few pieces I created in 2009. The new piece in the works is inspired by the same  area along the road I live on that inspired this one. I am fascinated by how tenacious the plants and trees that grow there are. It is a pretty hostile environment, with lots of rocks, a steep slope, shade and lots of dust coating things during the hot summer. The Mountain Laurel plants seem to be just hanging on by a thread, but they are actually deeply rooted old, abused specimens.

Mountain Laurel Flowers

Mountain Laurel Flowers along Water Road

In the photo above, the stems that show are pretty skinny, making it look like these plants were not very old. Upon digging around the bases a bit, I discovered that the stems were growing out from low, wide stumps. These are much older plants than it looks from a quick glance. The road they are growing along used to be one lane through the woods, up the side of the mountain. A number of years ago, it was widened so two vehicles can now pass safely. Most of the trees and vegetation close to the road was cut down on the high side of the road, while gravel was built up on the low side. These Mountain Laurel plants were victims of the massive cutting, but they grew back from the bases. They also continue to take more abuse when the road crews come along with their brush trimmers each summer. That would explain why the plants are so low, appearing to crawl along the ground.

The new piece on the wall will feature more of the rocks and dirt than the greens of “Mountain Laurel and Ferns”.  I had to break out the paints to modify a couple pieces of fabric to add to what I had in my stash.  I am also using some photos printed onto cotton, and there may also be a craggy, mossy tree trunk.

Fern Fabric

Fern Batik Fabric

The fabric above is the one I wanted to modify. This is not a fabric I like much, too much rusty orange. I decided to turn it into something to resemble the rocks and dirt around the Mountain Laurel plants.

Painted Fern Fabric Green

Painted Fern Fabric Green

Fern Fabric after Painting Gray

Fern Fabric after Painting Gray and Green

Above are the two pieces of the fabric that I ended up with. I toned down the contrast of the ferns and the rusty orange. I will be posting the process used to get to this point on my Classroom Blog.

These new fabrics will be used here and there in my newest creation. I am not sure how much will be used, but it now has more of a muddy, mossy look than it had.

If all goes well, there will be new posts soon showing progress of my new work. I will be away over the weekend, so I hope the ideas that have been flowing don’t stop.

First New Art Quilt of 2010

Saturday, January 23rd, 2010

I finally got the creative juices flowing a bit yesterday, and finished the first FFFC (Fast Friday Fabric Challenge)  quilt I have attempted in a very long time. New challenges are posted on the 4th Friday of each month, with the idea of finishing a small art quilt by the following Saturday. I originally thought that this piece would be done before the next challenge was posted, but while double checking the rules for Challenge 40, I found that the next challenge had already been posted- yesterday was the  4th Friday of January- where has the month gone?

Cocoa Mix Box

For Challenge #40, we were to pay attention to product packaging  and how the colors used affect your perception and buying decisions of the products, and then use the colors from a selected package in a quilt. The piece was to be a still life, and be mostly plants or flowers. I drink hot chocolate every morning, and used one of the boxes for my color palette. I immediately thought of my favorite cobalt blue glass bottles, and wanted to include a couple in my composition.

Blue Bottles on Cotton

Photos of Blue Bottles Printed on Cotton Fabric

I am not great re-creating glass in fabric, so I decided to take photos of the glass and a spool of thread, and printed them onto fusible backed cotton fabric.

Cobalt Blue Glass Bottles

Group of Cobalt Blue Glass Bottles and Eye Wash Cup

Here is one of  the photos I used to arrange on the page to print onto the fabric. I placed them on, and backed them white card stock to take the photo. I love the gold design on the perfume bottle- my favorite.

Layout one.

Ist Layout Idea

This was the first version of the layout. I hadn’t remembered that plants or flowers were to be a big part of the composition. The original thought was to use the thread spools and some chunks of chocolate around the bottles… Not too hard to change direction a bit…. the short bottle could be a vase,  and I had thought of adding a white flower on the table anyway.

Quilt layout 2

Second Layout Without Thread

OK, to keep with mostly plant theme, chocolate and thread spools are out, bottles and eye wash cup still in. I found some great silk leaves in the perfect shade of coppery brown found on the cocoa box to back the white silk flowers. I added a stem into the open top bottle, ready for flowers. The chocolate colored fabric I had picked out was used for the stems and small leaves needed.

Art Quilt in Progress

More Progress

Here is what it looks like after flowers have been added, and stitching has been done. Most of the flower petals were stitched only down there centers, leaving them 3-dimensional.

Art Quilt Blue Bottles and Flowers

Blue Bottles and Flowers

Here is the “finished” piece…. The more I look at it, I think I need to figure out a way to make the white lace show up better. The bottles look a bit dull to me, and I may add a bit of gloss medium over them….. The flower centers could use some beads.  I guess I will have to hang it on the design wall for a while to see what happens.

Update- 1-27-10-  Well, after looking at it for a few days, I decided to add some beads in the flowers. Below is the most recent photo.

Art Quilt Blue Bottles and Flowers by Sue Andrus, Andrus Gardens

Newest Version of Blue Bottles with Beads Added

Art Quilt Blue Bottles and Flowers by Sue Andrus, Detail, Andrus Gardens

Detail shot of Blue Bottles and Flowers

This last photo shows more detail.  I even added a little gold butterfly resting at the base of the lower right flower.