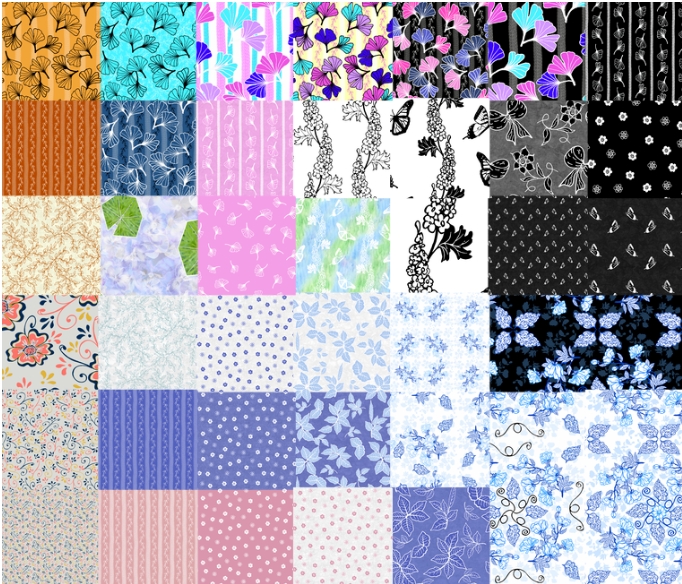
Posts Tagged ‘fabric’

I Lost a Few Months…

Monday, December 31st, 2012

Since my last post in late September, the past few months flew in the blink of an eye….Here is a quick rundown of the happenings since then till the end of the year….

The “After the Show Crash” from the quilt show was worse and longer lived than I had hoped, so I didn’t get back into the studio as soon as I had expected…  My Pears art cards were done with hand  stitching while I wasn’t feeling up to sitting at  my machine.  As it turned out, the hand stitching worked better than machine stitching would have been for the design I worked with.

First Trial of Thread for Pear Cards

First Trial of Thread for Pear Cards

The photo above shows a close shot of the first card I started stitching… I used a piece of a painted coffee filter gifted to me and a rusty  fabric from an exchange of fabrics and other goodies as the background of them with a piece of a fabric with text on it topped with a bit of handmade paper and scrap of ravelly silk. I also added a few beads over the  silk bit…  I ended up trying different threads and was to stitch the cards before I chose the stitching used on the bottom right card below.  It was a bit of a switch from  my “normal” work, but a very satisfying way to pass time when I was otherwise not feeling very well.

Four Pear Cards with Different Stitching Experiments.

Four Pear Cards with Different Stitching Experiments.

October brought visits with a new doctor in hopes of some answers to why I have less and less control over daily pain and fatigue…  New meds were tried, tests done, etc.  Our washing machine finally completely died, used hot tub was added to the deck, the last of the garden blooms of the year froze, and the last of the sunprinting sessions was done…. My last day under “The Big Top” was October 26th and by the end of that day the tent was down and packed away in the shed to wait until next year’s warmer weather.  We were blessed to miss the worst of Hurricane Sandy that caused so much damage to NYC and NJ along the coast.   I did get a few postcards and book covers started using some of my newest sunprints, and got my Art Cards for the AITC Fuchsia exchange finished and sent out on time for a change….

Fuchsia Single Card

Fuchsia Single Card

For the Fuchsia theme, I began with a dyed fuchsia colored fabric and combined stripes of it and a number of painted fabrics for the bases of the cards, then I added die cut butterflies and flowers in lime green. Mylar butterfly confetti added to the look of the butterflies, and Inktense Pencils and pearlescent paint added even more interest.  I actually did stitching done on these, too.

Fuchsia Group

Group of Fuchsia Cards

I forgot to take photos of the group until after I had them all in their clear bags, ready for the mail…. Pardon the shine of the plastic…

November began with the remnants of the storm and a set of  postcards made and sent as the last group due for Postmark’d Art.

Mixed Media Postcards

Mixed Media Postcards

The postcards shown above were made using various papers glued onto fabric with a coat of pearlescent paint over everything. The fruits were cut from a wallpaper border and die cut flowers and butterflies were also added… You can see the wrinkles of tissue paper that was used as the top paper layer.

Shortly after these postcards were mailed, the month of November became a blur….  Wreath orders came in and had to be filled (I was amazed that I got through another year of wreath making).  Our youngest son Nick and his wife and baby who live in Germany came to visit, and doctor’s appointments came and went…. I especially Loved being able to spend time with little Lincoln who had just turned a year old.  It is hard having family living so far away, but so great when they can visit!

December began with the last of the wreaths being delivered and purchase of nearly 200 new Spring blooming bulbs that I found 75% off at Lowes…. When I found they were so inexpensive, I just HAD to get some Tulips to go with the Daffodils and Hyacinth bulbs I originally wanted. A warm spell made planting a fairly pleasant thing to do… hard work, but the weather was great.  I also got a bit more sewing done using a few more sunprints. The second week of December was a visit to Zack’s house in Philly a pair of new shoes and a visit to Longwood Gardens to see the Christmas displays… Thankfully, the new shoes I got made walking much less painful than usual.

New Shoes and Ferns at Longwood

New Shoes and Ferns at Longwood

With the gardens frozen till Spring, it was wonderful to see all the flowers and plants in the conservatories and greenhouses as well as all the lights on trees inside and out.   Back home, I started to catch up on my Art Cards…. “Lake” was the theme for November (very late by now), and Tiger Lily was the December theme….  At first I thought Lake would be sooo easy…. I thought I had  the perfect fabric to use, but fabric did not work with the glossy media I wanted to use… After a couple utter failures, I finally got something close to what I had envisioned complete with a photo of a Loon on each…. The sounds and antics of the Loons I saw while on vacations in Canada at various lakes still bring smiles….  Instead of fabric as a background base, I ended up using a blue colored transparency.  The fabric didn’t allow the glossy goodies to remain very glossy….

Single Loon Lake Card with Glittery Thumb

Single Loon Lake Card with Glittery Thumb

Using profits from my wreath making, I purchased some new “fun” supplies to play with.  I got a number of different clear glossy mediums as well as several dollar store nail polishes in glittery and pearly colors, and very pearl-like paints.  After all the trouble these cards gave me, I ended up even glittering up my fingernails with one of the nail polishes when finishing them. The first time in many, many years I have painted my nails…. The first and last time for the glitter… I had fun with it, but removing it was very tricky….  It is hard to see in the photo, but I used Ranger’s Glossy Accents to add glossy dimension to the Loons.

The final theme of 2012 for AITC was Tiger Lily, and that set of cards caused me very little trouble… I envisioned the speckled petals of Tiger Lilies in the various colors that Lilies are available in.  This was my first attempt at featuring ink drawing on fabric.  Lily petals with the spots were drawn on a multicolored painted fabric, and accented with pearl paints, Glossy Accents, and beads for texture.

Group of 4 Tiger Lily Cards

Group of 4 Tiger Lily Cards

You can see the pearl paint in the lower 2 cards in the photo above.  The beads don’t show well, but they are there along with drops of the Glossy Accents that add texture and gloss to the rest of the spots.  The two sets of cards were mailed out to their new owners on the last day of 2012… Barely under the wire for the deadline of the second group.

Below is a photo of the two granddogs on Christmas morning….   A couple weeks before that Vladdi was covered with mud and skunk spray after a skunk made the bad decision to get inside the fence of the dog yard.  I couldn’t be mad at the dogs…. they were just doing what dogs do…. the skunk made his last mistake….  They both smell much better now….

Christmas Dogs

Christmas Dogs

Christmas brought snow and by the new year we had about a foot fall so far…. Maybe we will have a “real” winter this year….  I am praying for a great 2013 for all!!  Maybe I will finally get that “creative groove” back???

Fun in the Sun Under the Big Top

Saturday, September 1st, 2012

I finally had 3 nice days in a row that were nearly perfect for painting and sunprinting fabric.  This is the first year in a long time that I have put up my 10ft x 20ft tent outside the front door for painting fabric.

Paint Tent aka the "Big Top" Outdoor Studio Space

In order to do the sunprints I love so much, I need to work in the shade and have easy access to a sunny area for drying fabric.  In my early years of puddling with paint on fabric, I used my Easy-Up canopy to give me the shade. I would have to set the thing up in the morning and take it back down when I was done since those are not reliable in gusty, stormy, rainy weather.  My “Big Top” is made to be left up all summer for use as a carport or whatever and is shown ready for a painting session above. Securely staked into the ground and attached to the wall of our mobile home, it behaves pretty well. I am able to keep  my supplies outside ready to use with very little time or effort.The plastic drawer units and a couple plastic tubs hold most of my supplies.

I have been finding myself playing with much brighter and clearer colors than I used to work with.  This has been a wonderful change from the last big painting sessions a few years ago when it seemed all I ended up painting were muddy, mucky, mossy colors. I called it my “mud and rocks period”…  I would try to start a painting session with “pretty” colors, but seemed to end up with the browns, and mucky greens.

Day's Work 7-25-12

The photo above shows one group of fabrics painted back in July. I have been using my Dye-Na-Flow fabric paints which allow me to get deep, bright colors without adding the plastic feel of some other paints.  The Strawberry red, hot pink color is a new one for me to use… The light pink piece with the flowers was the first sunprint of the season, done with Phlox florets scattered over the painted fabric.  The green and yellowish piece was made for the Arts in the Cards “Cucumber” challenge… I printed it using titanium white and a zucchini cut to resemble a cucumber.

Ferns and Phlox Flowers Sunprint in Orange and Pink

I’m not exactly sure why I started playing with the hot pink and orange together, but I have done a number  of sunprinted panels with this color combination, am I am finding I like it.

Orange Lizards, Ferns and Frogs

This piece was one of the fun ones I did using foamie lizard and frog shapes along with Ferns for the sunprints on bright tangerine shades. I did end up playing with other bright colors as you can see from the next photo.

Aug 25 2012 Painted Fabrics Hanging on Tent

This photo shows the finished fabrics done on August 25th which gave the “Big Top” a tropical feel.  I started out playing with the Orange and Pink, then only Pink, then moved to shades of blue. I even did a couple landcape-ish pieces that are on the far right to use as backgrounds for some botanical applique art quilts.

It has felt so great to actually be playing with “pretty” colors again!  I like the bright tropical shades much better than the “mud and rocks” of the past!


Playing in the Studio Again!

Tuesday, October 11th, 2011

Well, I’m slowly getting back to posting here more regularly. Since the last post I ended up doing Waaayyyy more organizing in the studio than I had planned to, made my cards for the Arts in the Cards exchange, got behind with my weekly journals and caught back up again. In the middle of everything else I even got a little bit started toward cleaning up one of the biggest “eyesores” in the landscape around here.

Neat Shelves!

This photo above shows my shelves after I emptied every one of the “cubbies”, sorted and organized my fabrics. I have mostly my painted and dyed fabrics on the shelves now and will be selling off and storing what I keep of most of the commercial fabrics on the shelves in the office. Since my pot of pencils, pens, etc. seems to always be in the way on my table, I left a couple of the spaces free of fabric to keep things off the table.


Computer Parts

Once I got the cutting table cleared of debris again, I was able to get some of my projects done. The AIC exchange theme this round was Hardware…. Perfect, there is a lot of that around this place. My first thought was to see if I could find some little bits left from various computers that are stored in boxes… I soon found that nothing was small enough for an art card (and I wasn’t really into taking things apart… I leave that to my guys), I decided that I would use a photo of some of the parts as the background. I took a bunch of photos, and decided on a pretty simple layout.


Hardware Printed and Stitched Canvas

A photo of a circuit board of some kind? and one of part of some sort of hub-like purple thing (yea, I’m not geeky enough to know what is what) worked great together giving the feeling of sky and grass. You know me…. flowers always seem to pop up in my art.  I printed the photo onto cotton fabric, then fused that to some canvas I had to give some stability. I knew I was going to have flowers, and after playing with my card (the 7th one that included a printing boo boo) I had an idea of where I wanted stems and leaves that I stitched with silver metallic thread.


Painting Washers

On a trip with Ken to Lowes last week, I did wander down the hardware isle and check out all the little fun goodies they had. I only bought a package of little copper coated nails. While looking for the computer parts, I had to walk past Ken’s woodworking and hardware stuff. I found some of the cute little lock washers that look like gears on their insides. He had lots of each size, so I “borrowed” one each of 3 sizes for each of the 7 cards I needed to make. I also picked out some small “regular” looking lock washers (again… I’m no hardware expert..:). Since my little nails were copper coated, i pulled out my Lumiere paint and turned the plain washers into copper colored ones. Working with those tiny little pieces, I got as much paint on my fingers as the washers.


Hardware Card Wet Glue

I made two stems for each card out of copper and silver colored wire, and stitched them onto the bases (I only hit the wire once even with  my terrible eyes). After laying out the washers and nails, I realized things looked too sparse, so I pulled out some tiny grommets for paper crafting that I had collected years ago, and decided since computer parts were used for the background, I cut up an old software CD to make a couple more “flowers” for each card. The photo above shows one card while the glue was still wet. The grommets were attached using a hammer and grommet tool, and everything else was glued on with gel medium. You’d think I would have learned after painting the washers that working so tiny, I should have found a pair of tweezers to help me out. Instead, I ended up getting as much glue on my fingers and under my nails as got on what was being attached to the cards.  Once dry overnight, I printed up backs for the cards using more computer part photos, printed on a Radiant Gloss photo paper. The backs came out nice and shimmery, but the photo paper bubbled a bit with the heat of the iron when I fused it to the backs… Ahhhh another lesson learned.


Hardware Cards Set of 6

Above is the photo of the finished cards ready for mailing. There are 7 in this trade, so the 6 “good” ones get sent out, and the “guinea pig” one is mine to keep… Not exactly like these… it has all the trial and error boo boos on it :)


Week 5 Journal WIP

While doing my sorting and organizing in the studio, I found a bunch of unfinished projects dating back many years. As with the previous week’s journal quilt, I am using the smaller unfinished pieces for my weekly journal quilts. This was from my days of selling at art and craft shows, when I would work in batches. I would make up the bases of the pieces and then add the applique and quilting. This already had a few pieces fused on for fall leaves, so I finished it up with a tree.


Coloring Fabric

My tree needed more bright leaves, so I decided to color up some just for this one. The fabric is a leftover Wonder Under backed scrap from my placemat making days (that’s why the wierd shape). This piece is a white leaf print on slightly ivory fabric. I began by scribbling with my Inktense Blocks in orange, yellow, red, and a touch of mossy green.

Coloring Fabric Adding Water

I am still amazed at what happens when water is added over the Inktense blocks or pencil.

Coloring Fabric 1

The colors were too light and I wanted a bit of shimmer, so I pulled out the metallic paints. This was a gold color and looked too brown to start, so I scribbled with the Inktense blocks on the parchment near my thinned gold paint.

Mixing Paint

Look what happened when I pulled the Inktense pigment into the metallic paint… much nicer color.

Coloring Fabric 2

I liked the fabric a bit better after adding the mixed paint, but it still needed more, so I later added some more shades of metallic paints that I had on hand.

Week 5 Tree and Grass

While the paint dried, I turned back to the quilt itself. I cut out and fused on the tree trunk and branches. Then I added the stitched grass using one of my variegated threads in shades of green. I just did a sweeping patch of the grass to give the piece some movement.

Tree Texture and Outer Quilting Done

With the grass done, I needed to figure out what to do next. I added texture to the tree trunk with yarn couched on and added more branches by free motion stitching using a zig-zag stitch. This gave me heavier lines than straight FMQ would and it was fun to see how it turned out! I knew that because of the dense stitching in the grass and tree, I needed to keep the rest of the stitching and quilting dense, too. I used a pale variegated blue thread for the sky-like background, then I used a nearly matching thread in the green border and did a lot of tiny leaves vining around in the border. I also added more grass-like stitching along the bottom that would blend into the border. I fused a few fabric bits for fallen leaves and stitched the grass over most of them.

Week 5 Falling Leaves- SOLD

Once all the background quilting was done, I added the rest of the leaf fabric bits (some from a bright orange section of one of my dyed fabrics), and then stitched over them with a variegated thread in shades of orange through deep rust. I did this stitching to mimic the angled shapes I cut for the leaves.  After steaming it out, “Falling Leaves” is just about 8″x10″. This is the firs one I think is “sale worthy” (others may have differing opinions :) so I decided to list “Falling Leaves” is sold!  See more in my Art Quilt Shop on ArtFire.

Once I had my week 5 journal quilt done, week 6 was due, so I pulled out another WIP and finished that piece, too.

Week 6 WIP

This was a piece I started back in 2006 on the trip to Houston’s Quilt Festival as something to keep me  busy for at least part of 3 days in a car. I had fused the sunprints to the batting with the white accent fabric, then I hand couched the bulky yarn over the seams. I never got any farther with this until now.


Week 6 Detail

Since I have been wanting to play with my threads and stitching during this journal project, I decided to try something a bit different from what I normally would have done. I began with my “usual” vine quilting in the white areas using a pastel variegated thread that has all the colors of the sunprints. The stitching was pretty pale in color so I added more over the top with a purple metallic thread. Some of the yarn is stitched with a rosy purple metallic embroidery thread, so I thought I would add some metallic to the  vines.


Week 6 Sunprints

I didn’t do much new with the quilting in the sunprints themselves… I still like that the clear thread adds just enough texture to accent the prints without overpowering them like other threads I have tried do. To finish this off, I bound the edges with the same bulky black yarn with the colors in it that was used on the seams.  A lot accomplished in the studio in the past weeks! Finally!


Back of Workshop Mess

And to let you know that I have not totally been ignoring the gardens, here are a few photos. This one shows one of the worst “eyesores” in view of my studio’s North window. You can barely see the singlewide trailer that is a bit narrower than the one we live in that Ken is finally using as his woodworking shop. It is also where I make the wreaths in November and December. It is barely seen through the overgrown, falling down and obnoxious Sumac trees. The ones on the right of the photo fell down many years ago and are still lying there… I have had to mow around them and it’s not fun. In one way I hate to totally clear everything from here because the birds really love this mess. I plan to plant many of my baby trees in this area to have a neater and prettier bird sanctuary area. I have one huge pile of dead stuff ready to burn, and more is on today’s schedule to be  hacked and burned, too.


Salvia "Monsters"

I am also still learning my new camera… Here is a closeup of a couple florets of the Salvia Black and Blue… Probably the only Salvia I really like (most of them have red flowers). This photo came out pretty neat, with the florets looking like open mouths of some sort of monsters. The color even is pretty true without playing in photoshop!


Puff Balls and Moss on Stump

Thanks to Vladdi and Roxie chasing through the woods, I found this moss and puffballs on an old rotting stump. Vladdi and I were looking for Roxie who he left behind… She finally came slowly through the woods by the time we got too far.


Woods View

The last photo for this post… A shot of the trees in the woods. Lots of young trees, mostly Green Ash and Black Walnuts…. But a few more Sugar Maples are getting some size on them… They don’t seem to like the Walnuts… We usually get tons of seedlings, but very few live more than a couple years. There aren’t many Walnuts in the North end of the woods, and we are finally seeing some Fall color in that direction!  Walnuts and Ash aren’t great for color… A little yellow for a short time.  The Sugar Maples are the best! (in my opinion).

A New Beginning?

Tuesday, September 13th, 2011

My last post was 3 weeks ago, and the perennials in the gardens are beginning to look a bit shabby… It didn’t help that we had nearly a week with no sun and 4 straight days with rain… One of them with 6.5″ in less than 24 hours….

Soggy Hibiscus

The above photo shows the Pink Hibiscus after one day of rain on Sept. 6…

Back Yard Rivers before digging

September 7th- The Mound Garden river was flowing again…. This time, I had a ditch dug in the dog yard to divert some water to the woods… It took a lot of water (near the back fence), but there was more water going through the Mound Garden than in any previous storms of the year….

River outside Studio

This photo shows the river as it passed in front of my studio window… The water running by the propane tank headed straight for my studio wall and ran right around it, then flooded much of the dog yard… Poor pups! They didn’t know whether they wanted to go out to do their business or not… Some water had puddled under my sewing machine and the towel I keep along the wall was soaked, so some re-routing of the river was required.

Back Yard rivers after digging

During a slower rain shower, I was able to dig the ditch in front of my studio deeper and also dug the ditch to the woods deeper to give the water a place to go. As you can see in this photo above, there is a lot of water in the ditch in the dog yard, and very little in the garden… That helped for a while, but a later heavy downpour caused breaks and overflows in the ditches, so I had to choose another break in the rain to do more digging…

Van in driveway

We usually park the mini van in the lower parking area, but we had gotten groceries the last time it was driven, so it was parked and left in this part of the driveway… The water was getting really high, and when I went to move it before my second digging session, the wheels were already partly buried in the gravel that had washed from the upper part of the driveway.

Flooded Dog Yard again

This was one of those helpless feeling moments…. The latest heavy downpour had overflowed the banks of the ditches and broken part of one of my new levees (left side of pic, inside the dog yard).  When I got out there later to do damage control, I found that grass, leaves and other debris as well as LOTS of driveway gravel had plugged the wire of the fence and caused water to stand everywhere and return even worse to the mound garden.

Dog Yard after Flood

Sept. 8th, after the bulk of the rain had fallen, this is what the dog yard looked like… The two piles of mud and gravel along the back fence is what I dug out away from the fence, trying to get the water to go under instead of through it. I had 3 areas where water was flowing under the fence, and the middle one clogged again…. The gravel came from far up the driveway….

Culvert by Upper Parking Area

This photo shows some of the deep gullies formed in the driveway… I am really glad I added the big rocks by the pipe before the storm… This culvert has been washed out too many times this year.  There was still a big ditch from the previous storm, so I filled in much of it with rocks…. Some stayed! It’s amazing how much damage water just from 1/4 mile above us could do…. all that water ended up heading to the Susquehanna after collecting more along it’s path…. We were very lucky living this high up. The river flooding was near or above record levels with many homes and businesses being affected.

Wet Mini Rose

Here is a lonely bloom on the mini Rose bush….

Harry is still trying to grow!

“Poor Harry” seemed to like all the water…. He seemed to put out some pretty good new shoots!  The poor thing has been munched on much of the summer… it seems every time he has put out new growth, it has been eaten off. This time I gave him a douse of dear repellent before he became deer snack again.

And speaking of “Poor Harry” (a Harry Lauder’s Walking stick bush), he was the inspiration for my latest batch of art cards for my trade group.

Harry in the Petunias

The full view of Harry shows the dead branches that he was left with after being mauled by deer. I liked the shape of these branches, so I left them even though they are dead. A bit of “sculpture” in the garden. I took this photo and removed the background in photoshop to  use for the art cards.

Balance ATC's Printed

The theme for this trade was “Balance”… My gardens have been about the only thing to give ma any balance to my life lately, and Harry makes a pretty balanced “sculpture” in the garden, so he was to be the star. I began by fusing random scraps of fusible backed fabrics to parchment paper until I had  just a bit larger than a sheet of paper. I wanted to print Harry’s picture on this fused background, so I painted over the fabrics with titanium white to soften the colors, and a bit of gel gloss to seal and snaggy edges.  I then set up the document to print and it  worked! No Jams!  The above photo shows the printed fabric  base.

Balance Pair started

This photo shows two of the cards after they were cut to size and Inktense pencil was added for the Petunias in the garden. I had only dampened the pencil for Harry’s leaves, and not the flowers yet.

"Poor Harry" Balance Cards

Above are four of the finished cards… See how much more vibrant the colors from the Inktense pencils are after I painted over them with very dilute gel medium. I added some more deep shading on Harry with the pencils and thicker gel gloss to give him a little shine like he has in real life.  I finished these cards the day before the heaviest rain hit, and they got in the mail just in time… I’m not sure how many days we were without mail after that….

Studio Window Garden

Since I have been pretty creatively blocked lately, I have been trying different things to get things moving again…. A member of the Quiltart list was about to turn 49 a few weeks ago and decided she would make a little journal quilt each week during her 50th year. She invited others to join her, and since I just turned 50 last month, I decided it might be something to get me back into creating.  For the first piece, I used the photo of the view of the garden I see from my studio window when sitting at my machine.

Week 1 Sept. 4

The “due date” for the first piece was Sept. 4th…. Thankfully the rules for the group are pretty flexible, and I only had part of the piece fused together by then, but for me that was better than I had done in a long time. Yesterday, I finally finished it…. It took a while to do the quilting with all the thread color changes I did, but Free Motion Quilting seems to be like riding a bike… I was a little rusty at first, but moved along pretty quickly. The photo above shows the finished piece!

Before I started quilting week one’s quilt, I worked on the second piece.

Week 2 Beginning with Photo

Since week two included the storm, I just had to use a part of one of the photos of the water flowing through my Mound Garden.  Above is the photo I used with the beginning of the quilt before quilting.

Week 2 Sept. 12

Here is the finished piece for week two. I played with different shades of beige and brown threads for the muddy water and gravel in the quilting. The main fabric in the middle of the piece is a bit of a small piece of a batik I had that gave the feel of much of the upper part of the garden. The lower part of the garden is a piece of my pale hand dyed fabric with Inktense pencil used to add the green for the leaves of the plants. I used little touches of titanium white paint for the Phlox and Echinacea flowers, and quilting with a variegated bright pinks thread makes the Vinca flowers.

While these two little pieces aren’t a lot, I really hope they will be the beginning of my creative mojo returning…. Maybe I’ll even finish a quilt that I started nearly 1 1/2 years ago.  I’ll take any creative bursts I can get!!

Colorful Fabric Dyeing Results

Tuesday, March 29th, 2011

This post will mainly show some of the fun, colorful fabrics that I dyed in the past week. I usually use paint because we have a well that is not very reliable in the warmer months. Right now, there is still snow on the ground, and with the melting going on, all the springs are running full tilt so I am playing while I can.

Windbreak Trees March 24, 2011

This is what had me in great need of some “Color Therapy”. This was what it looked like heading up the driveway last Thursday after another snowstorm on Wednesday. I started ripping fabric, scrunching it into containers, and squirting on colors while the snow fell. Thursday was the first wash-out day.

4 Yards in Dye Pan

The above photo shows one of the first batches soaking in soda ash.

Multi Color Yard 1

Here is one of the pieces from the first tub…. As you saw in the earlier photo, I just randomly squirted concentrated dyes onto the scrunched fabrics.  This is only one of 4 pieces from the first sweater sized tub. The next few pieces that I did were sample fat quarters to see what the colors I had would look like.

Cerulean Blue and Fuchsia

Fire Red and Cobalt Blue

Mixed Blues Quarter

The above piece is a mix of 3 different blues. Some of the blues ended up nearly the shade of the sky in the first photo.

Spring Green

1 Yard Brights 1

This and the next large pieces were done in the same tub. I used less colors and kept them clearer by not overlapping them much. For the green, I mixed yellow with a couple of the blues, then added it. The above photo was randomly scrunched, while the lower one was sort of fan-fold scrunched on the diagonal, then packed into the tub.

1 Yard Brights 2

Mediums Yard

The piece above was scrunched similarly to the previous one, but I diluted the dyes before adding them so the colors would be less intense.

2 yd Plus Mediums

This piece above is over 2 yards that was scrunched into the bottom of the sweater size tub. I used diluted dyes for this one, too so the colors are similar to the one before it. I was trying to get a lot of different “garden-like” areas to play with. I had to lay this on my bed to take the photo, so it is hard to see all the details.

2 yd Brights

This piece above is another bright one that I expected to come  out  much different… I guess that is one thing about fabric dyeing, you don’t know for sure what you will end up with until the fabric is completely rinsed and dried.

Fuchsia

Here is a piece done with Fuchsia, the way I scrunched it into a small square container allowed it to be deeper in some areas and much lighter in others.

Fire Red Quarters

Here are two pieces done with Fire Red. The lighter piece was scrunched and placed on top of the first piece so it got less dye on it.

Yard Spring Green

This piece is a color that I am hoping to see outdoors someday soon…. Some bright springy green would be a nice change from the white snow and brown mud…. At least I have been able to play with lots of pretty colors indoors while waiting for the gardens to bloom again.

Once I finish another big day of ironing, I will have more pretties to show. I have even dyed up some sad looking towels to give them new life as well as some white shirts and tops… A great way to update the wardrobe.