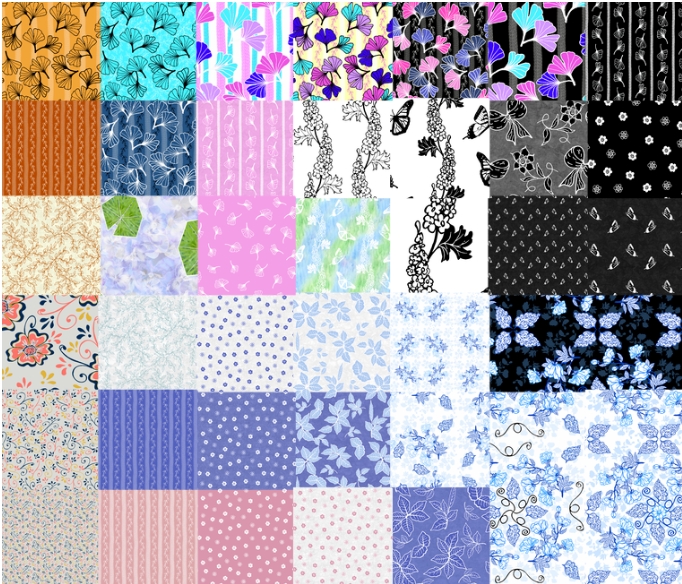
Posts Tagged ‘sue andrus’

Playing with Inktense Blocks Part 1

Tuesday, March 15th, 2011

I was amazed a while ago when I left a comment on the Facebook page of Derwent Pencils for a chance to win a tin of their brand new Inktense Blocks, and WON!! I was one of five winners, and my new tin of fun arrived over the weekend.

Inktense Blocks Tin

I spent the weekend with a nasty fibro flare, so I didn’t do anything with them until yesterday. I got a design drawn out on some cotton fabric backed with Wonder Under with the paper backing, making it easier to draw  on…. Today, Tuesday, I finally cracked open the plastic seal on the Inktense Blocks.

Inktense Blocks Opened

This month’s theme for the “Arts in the Cards” ATC group is Indigo… anything goes that uses any shade of blue. My first thought was Delphiniums, of course…. I love them and they come in so many great shades of blue. I first drew (actually traced an enlarged drawing) a Delphinium stem lightly in pencil, then outlined the flowers with my Deep Indigo Inktense Pencil. After outlining, I went over the Inktense with something I have had lurking in my supply drawer for well over a year….

Blender Pen with Inktense

In the above photo to the right of the colored pencil is what I found works super for wetting the Inktense pencil, causes minimal bleeding on the fabric, and is so much easier for me to use than a tiny paintbrush with water. I bought a set of blender pens at a Stampin’ Up! party for Scrapbooking. I first intended to use the pens with my water soluble wax pastels (I also bought colors of those I didn’t have yet that were demonstrated that night). Due to the creative block problem, I had not even opened up the box of  3 pens I bought until now.

Blender Pen with Inktense Pencil

As you can see in this photo above, the blender pen has a nice sharp tip and is easy to control. You can see how the color of the Inktense pencil intensifies when water is added to it. My first attempt at using my pencils with the Chickadees was a real learning experience. It took a lot of time to reload the brush with water and(or) medium. The blender pen fed a constant supply of water to the tip…. It was just like tracing over the pencil with a felt tip pen.

Blender Pen Over Inktense Pencil Outlines

This photo shows what a section of the Delphinium florets looked like after they were outlined with the Inktense pencil and then dampened with the blender pen. I finished all of the outlines, then allowed the fabric to dry. The Inktense pigments are permanent after they have been totally dissolved with water, then dried.

Inktense Blocks Sample Marks

Once the outlines were dry, the fun began with the Inktense Blocks! The new blocks are the solid pigment, without the outer wood of the pencils. They look like, and can be used like pastels to add color to a project. I made a few sample marks to get a feel for how the blocks would work. I began with a swipe with the full end of a block, then drew a line using a corner of the block. The block used in the above photo was the Deep Indigo, the first wide one was pressed harder than the second wide one. It looks nearly black when dry, and the first marks I made left a few crumbles as the edge was smoothed up. I brushed off those loose bits into a little cup.  I will show what I did with the “crumbles” later….

Inktense Blocks Added On Fabric

I used the end of the block to fill in the petals with color. I didn’t add too much to start, so I could test the waters, so to speak.

Adding Water to Inktense

You can see what a difference the water makes with the Inktense pigments. The first lines that I colored and dried stayed in place nicely, and it did not take too long to really brighten up the flowers. The blocks are great for coloring larger areas without getting the “scribble” lines I always end up with using the pencils. Using the blocks on cotton fabric is a little more challenging than smooth paper. The weave of the fabric grabs the pigment from the blocks, causing some streaks and more color to be laid down where the backing paper had wrinkles, too. “Scrubbing” a bit with the blender pen helped to move the color to where I wanted it.

Blender Pen on Inktense Block

Another way to use the Inktense Blocks is to treat them as you would a solid watercolor paint. I wanted to add a bit of purple to the flowers, so I used the other tip of the blender pen (each pen has 2 tips) like a paint brush to pick up some of the pigment to accent the flower petals.

Adding Fuchsia with Pen

The above photo shows the Fuchsia Inktense added to a floret. I had already added a bit of Sea Blue over the Deep Indigo to vary the color in the petals more like they are in nature. The first streak or two of the Fuchsia were a bit intense, but with a bit of work I was able to blend them in a bit.

Two Florets Colored

This photo above shows two of the florets fully dampened with all 3 colors used. The rest of the florets have just been colored in with the dry blues, ready for water.

Inktense Crumbs in Cup

Ahhhh…. back to the crumbs…..  I brushed the crumbles into a bottle cap and dropped a bit of water onto them. This is another way the Inktense Blocks can be used…. They can be grated and mixed with water to make a liquid watercolor paint. To play with my flowers, I just added a drop or two at a time and used the blender pen as my brush.

Delphiniums Colored

The final photo for this post…. I used the crumbs mixed with water to add more color to the petals. There were crumbs of both shades of blue, so that helped to even out some of the streaking I ended up with. The upper florets were still damp when I took the photo and looked a bit deeper than they ended up. The lower ones that are quite light hadn’t been painted over with the liquid color yet. I will let this dry over night and see what I decide to play with for the background… I am not sure what color I will try yet….. To color in the large background area, the blocks can be used along the long edges to quickly lay down a lot of color. I am toying with the idea of using a very light touch of the Fuchsia for a pale pink background that will add a cast of pink over the flowers, too if I just go over the whole thing with the color… I plan to add a bit of pearlescent paint to the floret centers, so losing the white there will not be a problem…. Tomorrow I will try to have another update….

Recycling Can be Beautiful!

Friday, March 4th, 2011

The ATC exchange group, “Arts in the Cards” had Reduce, Reuse, Recycle as our latest theme. With ATC’s being so small, they are a great way to use little bits of this and that to create unique art pieces.

ATC Base

For this group of cards, I began with a piece of fabric paper that I made at least a year ago. It consists of a faded  piece of fabric covered with pages from an old book, pictures from gardening catalogs, and tissue papers saved from gifts I had received. Much of the surface was covered with pearlescent medium and I had stamped some large butterflies with blue paint. I started by drawing lines for the edges of the cards so I knew how to lay things out for each card. If I had paid attention earlier, I would have noticed that the left 3 cards were drawn too small… I found that out when I was cutting the cards apart in one of the final steps…. Oops!!

ATC Base with stamp waste

The next step was to add the “waste” from a couple pages of postage stamps. These were from Hawaiian Rain Forest stamps that Ken came home with after I asked him to get me some “pretty” stamps…. flowers preferably….. The Hawaiian stamps were the prettiest the post office he went to had. After the stamps were used, there were a lot of pretty “stickers” left behind. I left many of the pieces as they were, and cut others apart. The above photo shows the paper fabric with the stamp waste applied.

Stamped Flowers and Some Butterflies Added

Once I had the stamp waste on, I tried to figure out where I was going to place some pink paper that I made from junk mail and waste paper from the printer, that I had textured by pressing heavy lace into the wet pulp.  (A little piece of the paper is in the above photo with colored in circles on it, next to the glitter.) The paper didn’t look right, so I pulled out my pearlescent medium and a flower stamp to add flowers with. The flowers were too pale, so I added fuschia colored glitter to the wet medium. The glittery flowers lost their definition, but added lots of color. I then stamped more flowers with white opaque paint, and even added white over the glittered flowers. I still wasn’t happy with the flowers, so I pulled out my Derwent Inktense watercolor pencils to add more color. I added yellow to the flower centers, and orange to the petals.

Recycle ATC's before cutting

Somehow while clearing my cutting table to work on or finding supplies, I found a piece of black sheer fabric with the glittery butterflies.  The fabric was already backed with Wonder Under, so I cut out the butterflies and added them. I didn’t have enough for each card, so I found a chunk of printed organza backed with Wonder Under with butterflies and flowers on it. I cut out butterflies for the cards that needed them and also some flowers and leaves to add to other cards that were lacking. The white organza didn’t show up very well, so I used more of the pencils to brighten them up. I added fuschia and orange to the butterflies, and made their bodies and antennae black. The photo above is what the cards looked like just before I cut them apart.

I added Wonder Under to the back of this piece, so I could fuse to card stock backs. When I cut the first 3 cards from the left end of the piece, I realized that I had not measured right for my first line and they were all nearly 1/4″ too short. No problem, I used trimmings from other cards to add to the short ones to make them the correct size (I thought I had all of the cards a bit oversized…. Not).

Finished Hawaii Dreamin' Cards

The cut pieces were fused to the card stock backs, and I colored the edges using a lavender stamp pad that I had never used…. One of those things I picked up from the craft store, thinking it would come in handy some day. In my excitement to get the finished  cards out in the mail to their new owners, I forgot to take photos of all of the cards in the batch…. Above is a photo of the card I am keeping for myself, and 3 extra cards. Thankfully I had a few extras or I would have only had one finished card to show.

It was fun playing with things that would have ended up in the trash or were just being ignored. I also like the images on the postage stamps and around them. Since things are so icy outside still, I could at least play with flowers indoors and dream of visiting Hawaii….  Soon, three of the above cards will be available as ACEO’s for sale in my ArtFire Studio…. I’ll add a link when they are listed…. I guess it’s time for sleep now….

More Playing with Inktense Pencils

Tuesday, January 25th, 2011

After finishing my little Chickadees, I decided I needed to see what else I could do with my Inktense colored pencils. I sold out of my covered mini photo albums, or brag books in early December, and really need to get more made. The covers were made using sunprinted fabric or photo transfers along with whatever dyed or painted fabric I thought looked good with the focus piece.

Brag book- Set of 4

This photo above shows a little group of the books I finished last fall. I try to use my best sunprints for the focus fabrics on the fronts of the covers, but I have LOTS of prints that just don’t have that WOW factor…. They are either not very sharp, or otherwise pretty boring.

Cosmos Sunprint

This photo shows one of the “wishy-washy” sunprints. The fern printed OK, but the Cosmos flowers are pretty blurry. Also, there isn’t much contrast in the piece of fabric. I could jazz it up with stitching and thread, but decided this was one good “victim” to try my pencils on.

Cosmos with Pencil

Above is another sunprint from a similar batch after I outlined the flowers and centers with the Inktnse pencils. I used Fuchsia for the petals, and Sun Yellow for the centers. I lightly dampened the fabric just were I wanted to add color with water, and added the pencil. Since I love all things sparkly, I decided to see what happened if I used my iridescent medium over the pencil to finish things. I used very watered down medium over the flowers, then added some thicker pearl to the flower centers, dotted over the yellow. With the water just where I wanted the color, and careful placement of the medium, I got pretty sharp lines.

Maple Sunprints

This is a sunprint of a couple of Maple leaves on nearly black paint.

Penciled Maples

This photo above doesn’t do justice to these leaves, but here is what happened when I drew the veins in the Maple leaf sunprints done on black. I started by just adding water over the pencil, but since I was playing with sparkle, I decided to add some to these… The effect gives an impression of the sun shimmering off snow on a very cold day. I kept the pearlescent medium just in the leaf areas. The actual look is much softer than the photo.

Ginkgo Sunprint

Here is one of my Ginkgo leaf sunprints on black…..

Ginkgo Cover

I tried a similar idea with the Ginkgo sunprints. I added Fuschia colored veins with the pencil, then used the pearlescent medium that wasn’t as watered down as on the Maples. The thicker layer of paint nearly covers the color completely. The camera is also picking up a lot of shine…. in real life, at different angles, you see varying amounts of the pencil color.

Fern with Flowers

Here is what I ended up with when I dipped the Violet pencil in water, then scribbled over a small flower stamp I have. The stamp gave a faint outline that I then traced over to get more color. I again used very watered down pearlescent medium over the pencil, then thick medium for the centers. The flower centers are sparkly even though they look white here.

Album Covers in Progress

This photo shows some more of the sunprints I played with. A  couple more on black, where I added color, and other sunprints I added little bits of color to. I have used some of last Spring’s dyed fabric for the remainder of each cover. The pieces used here are pretty bright and pull colors from the pencil I added. It will be fun to see how these look when I get them finished.

One thing I discovered while starting these, is that the little sketch book I made and used for my bird sketches will fit just right in one of these covers. I didn’t really pay attention to the size of the book I was making- I just cut the heavy drawing paper I had and folded, but the pages ended up being 4″x6″… just the size of the photos that fit in the albums that go in these covers.

So far this year is beginning much more creatively than the past couple…. Now to get these albums  finished so I can list them in my Andrus Gardens Studio on ArtFire.

ArtFire, A Handmade Seller’s Marketplace

Sunday, September 19th, 2010

The other side of ArtFire…. Selling…

(Info updated Jan. 2012)

Artfire is not only a great place for buyers to find unique items to purchase, it is a great place to get your artwork or handmade items in front of people from all over the world to sell it. In the previous post, I showed a picture of my Andrus Gardens Quilts Studio on ArtFire.  Please pardon any rambling in this post, but there is so much I want to say…. I will have lots of links to take you right to the source for much of the information.

I heard of ArtFire.com nearly 3 years ago, and tried out that first studio, not knowing what would happen. Now I have 3 studios there. I began on Etsy and had multiple shops there, but have moved my items from there. Etsy is a great place for some people, but I have found ArtFire to be a better “fit” for me and my work. This post will let you know why I prefer Artfire for my main online sales presence.

Andrus Gardens Quilts- Art Quilts ArtFire Front Page

Since first writing this, the look of studio pages has been upgraded…. The photo above shows the new version.

The photo above is a screenshot of my Andrus Gardens Quilts Studio on Artfire, where I have my Art Quilts and Note Cards.

Andrus Gardens Designs Fabric and Pattern Studio on Artfire, Sue Andrus

Pattern and Fabric Studio

As an artist, or craftsperson, one can set up a studio and list items  for sale for very little or even no cost to try things out. There are many sites that can host retail stores or shops such as  Ebay, Etsy, and others, who charge a fee for each item listed for sale, and then charge another fee based on the selling price of the item after it sells. The great thing about ArtFire is that you can give things a test drive for a month with no fee at all if you want, Using this link. The above photo is a screenshot of my newest studio Andrus Gardens Designs, that was one of the original free Basic studios which are no longer available, and all shops now have a monthly fee and all can be personalized the way you want (since originally writing this, it is now a Pro studio and looks a lot different).  There is no playing the re-list game (and paying to do it) trying to get items to the top of pages, as items are selected randomly, or based on your tags and descriptions for search results, not by when they were listed. Every item is also submitted to Google base so they can be found in searches quicker. Anyone can also take advantage of many Tutorials and Help Guides where they can learn pretty much anything you need to know to get set up and become successful.

Andrus Gardens Quilts Studio on Artfire, Sue Andrus

Sue's Artfire Art Studio 2

Above is another pic of my Art Quilt Studio- Andrus Gardens Quilts

The Pro (or paid) account is now $12.95 per month (Jan. 2012), and that covers everything.  Since I tend to trip over my brain trying to get things into words (and to keep rambling to a minimum), here is a Link to ArtFire’s Seller Page where you can find all kinds of information and find out how to get a free one month trial.  Use this link for a referral program where you can get your 3rd month free in addition to giving me a free month too!

I also can place widgets in the right sidebar of the main page as seen in the last photo of my Art Quilts Studio to link to my other sites I would like people to go to…  (Above photo is of the old version of the studio set-up… Things are a little different looking now)

Fine Art Photography

Talk about grabbing eyes…. the above Collection is one I made from items found in both of my first studios. (Update- 01-21-2012, New Collection- Any empty spaces in the collection mean those items have sold since it was made!) Unlike the Treasuries on Etsy, the collections here can be used for promoting your own items, too, and there is an easy widget feature to help you place it in your blog or wherever, like I did here!  Collections can be chosen for the front page feature, and of course, one with all my own items would not qualify for the front page.

OK, I’ve rambled enough for now….. If you can’t tell, I am very impressed with how ArtFire is set up and run. I have even been a part of the Maven’s Team, and have been able to help test out and try to “break” new pages, and features to be sure that when new things are open to the whole community, the bulk of the bugs are worked out already.  It is a great community to belong to, and one that is ready to help others be successful, too.

Oh yea, see on the sidebar of this blog……>  The “Rapid Carts” are made really easily from the studios, too and can be used on blogs or websites….

TWO Quilts Finished!

Wednesday, August 18th, 2010

OK, I am excited, and they are both small, but just finishing anything this year is an accomplishment!

Stormy Sky Finished

I finally got time to finish the quilting on this one… Made for last month’s Fast Friday Fabric Challenge.  I had all but the sky quilted, but was unsure how to continue, so I uploaded it to the FFFC Blog anyway for some ideas. We then left for GA, and I finally got back to it. I used clear thread, and did have to do a bit of touching up of the needle marks in the sky. It finished at 10″x10″ with the black suede yarn binding.

Stormy Sky quilting holes

When I finished stitching, the holes from the needle really showed up a lot…. Not good! (the above photo shows them fairly well, it also shows more shine than the piece really has) So I pulled out my thinned gel gloss medium, water soluble wax pastels, and a stiff small brush….. I tried to match the color of the medium to the area of the sky I was working on, and it worked nicely. I did have to add a new back over it to cover the mess I created there with the color running through the holes, but I like the effect much better now.  The only thing that jumps out at me now is the “A” in the sky… not sure what I was doing when I zigged instead of keeping things rounded…

Stormy Sky Finished Detail

Here is a closer look… I also am not sure how I ended up with the tree top leaning so much, but I could say “the wind was blowing”, even though it wasn’t at the time I took the inspiration photo. Maybe it only bothers me….

Orange Echinacea on the Rocks Finished

This is the second piece I finished…. It has been in the works for much longer. This is 12″x12″ in size with the fuzzy yarn binding. I had the lower right rocky section beaded, then stopped. As shown in the preceding post, I finally got it back out while on our GA trip. I am really glad I put in my “travel bead studio” last minute…. I almost went away with no hand project at all to work on…. That’s how bad things have been quilt wise….

Orange Echinacea on the Rocks detail

Here is a detail shot showing some of the tiny shells, bug beads, and gemstone chips I added. I also added beads to the flower center for more texture. “Orange Echinacea on the Rocks” is available in my Andrus Gardens Quilts Studio on Artfire.

Now I even have a few more pins beaded since my last post!

Birthday Art Quilt Sale

Saturday, July 17th, 2010

Look What Artfire has come up with!! We can now curate collections of items that we like, and I am using this one to show you a few things that are are available in my Birthday Sale!

Check out my Art Quilt Artfire Studio for my Birthday Art Quilt Sale!!
Purchase 2 Art Quilts at the sale price, and choose a third for FREE!!
See my Artfire Studio Blog for more details.

After the Washout…. Dye Update

Friday, July 9th, 2010

Now that all the fabric I dyed last week has been thoroughly rinsed and then ironed, I know what I have to play with and what will need some more work.
As you can see in the photo above, that all was not lost… far from it!! I ended up with some pretty wishy-washy colors, but there were some very pleasant surprises.  After some comments made and information from others, I am not tossing my dye concentrates yet… I will give them another try, but this time give the fabrics more hours in the soda ash soak. I only left these an hour or so because I was in a hurry.   Here is what hurrying got me:

Shibori 1 fresh

The above photo is the only one taken of what any of my fabrics looked like fresh out of the dyebath after only an initial rinse. It was really striking with the rich, deep colors, but as I began to rinse, more and more of that beautiful color left….

Shibori 1 Ironed

The piece still has some great patterning, but is nothing like it first looked. The golden yellow stayed the best because it was the only freshly  mixed dye I had used.

Fat Quarter Clean-up

One of the clean-up fabric pieces… not much color left….

Shibori 2

I think this is my favorite piece…. I love the soft colors and the way the fuchsia faded to a pale rose into the green. Very sky or water-like…

Blue Purple

This one kept quite a bit of color. I love the icy patterns that I got.

Lavender Blue Narrow

This one is even icier with less rose tones and touches of greenish blue here and there. This is a 2 yard piece that I cut in half lengthwise… I thought it was only one yard, but now I have a long piece.

Dark Green

This was supposed to be a deep, dark green… it still is green, just more of a seafoam shaded piece. I wanted some pieces for mountains, but got seashore instead.

Another Green

This one held a bit more yellow…. still lots of patterning.

Minty Green Tone on Tone

This is another green… more “minty”, and this started as a white on white print… I have two sides to choose from :)

Multi Half Yard

This one really surprised me… I was amazed that the black that I watered down before putting it on, stayed much better than I expected. This was expected to have much darker fuchsia. I had tried to get these colors and patterning on purpose in the past… I got it by accident… A happy accident…

Soft Pastels

One of the more “wish-washy” pieces. This will be used for sunprinting, or may be cut up and used for skies….

Pale Blue Tone on Tone

This one is really pale… Another white on white, so I have two sides to choose from. Not sure if I will do more, or leave it to use where I need just a touch of color.

Mustardish Piece

Any better description?? This one reminds me of something that the mustard bottle blew up on… Probably my least favorite, so this is in line to be overdyed or painted. This is the piece of fabric I placed in the bottom of the bucket that Shibori 1 sat in, so I could catch all the drips…. very sad pale blue and mustard….

Small Pieces

A random few smaller pieces. Most that I did were one yard pieces, but these are fat quarters and a half yard. The fat quarters were clean-up “rags” and I am still amazed at how much the black stayed around…. that golden yellow did great… the difference fresh dye makes.  This dye session was a real learning experience, but gave me a lot of great usable pieces. I will have to play with soda ash soaking things much longer to see if I can get more color from the old dyes… I hate to toss anything out if there is any good in it….

Tall Pink Lily Flower

I gotta add a couple flowers… This Lily is taller than I am, with gobs of flowers. It smells wonderful!

Hosta Sweet Tater Pie

It looked like a spotlight was on this Hosta, with the sun beaming through the leaves of the trees in the back yard. It has bright lime green leaves which look even more yellow in the sun.
I need to get back to the studio… I have a group of postcards in the works…. Photos when I get more done…

Playing With Mud and Rocks Again

Friday, January 29th, 2010

Actually I am playing with paint on fabric to resemble mud, rocks, moss, ferns and flowers for a new art quilt I am working on. I have had the idea for this piece in the back of my head for a long time…. You know the kind…. an idea that keeps peeking out to say it wants to be done, but every time you try to put idea to fabric, things don’t work right, and the idea gets crammed back into the recesses of the mind until it decides to pop out again…. Finally this idea has actually gotten on the design wall, and is progressing.

Art Quilt "Mountain Laurel and Ferns" by Sue Andrus, Andrus Gardens

"Mountain Laurel and Ferns"

“Mountain Laurel and Ferns” was one of the few pieces I created in 2009. The new piece in the works is inspired by the same  area along the road I live on that inspired this one. I am fascinated by how tenacious the plants and trees that grow there are. It is a pretty hostile environment, with lots of rocks, a steep slope, shade and lots of dust coating things during the hot summer. The Mountain Laurel plants seem to be just hanging on by a thread, but they are actually deeply rooted old, abused specimens.

Mountain Laurel Flowers

Mountain Laurel Flowers along Water Road

In the photo above, the stems that show are pretty skinny, making it look like these plants were not very old. Upon digging around the bases a bit, I discovered that the stems were growing out from low, wide stumps. These are much older plants than it looks from a quick glance. The road they are growing along used to be one lane through the woods, up the side of the mountain. A number of years ago, it was widened so two vehicles can now pass safely. Most of the trees and vegetation close to the road was cut down on the high side of the road, while gravel was built up on the low side. These Mountain Laurel plants were victims of the massive cutting, but they grew back from the bases. They also continue to take more abuse when the road crews come along with their brush trimmers each summer. That would explain why the plants are so low, appearing to crawl along the ground.

The new piece on the wall will feature more of the rocks and dirt than the greens of “Mountain Laurel and Ferns”.  I had to break out the paints to modify a couple pieces of fabric to add to what I had in my stash.  I am also using some photos printed onto cotton, and there may also be a craggy, mossy tree trunk.

Fern Fabric

Fern Batik Fabric

The fabric above is the one I wanted to modify. This is not a fabric I like much, too much rusty orange. I decided to turn it into something to resemble the rocks and dirt around the Mountain Laurel plants.

Painted Fern Fabric Green

Painted Fern Fabric Green

Fern Fabric after Painting Gray

Fern Fabric after Painting Gray and Green

Above are the two pieces of the fabric that I ended up with. I toned down the contrast of the ferns and the rusty orange. I will be posting the process used to get to this point on my Classroom Blog.

These new fabrics will be used here and there in my newest creation. I am not sure how much will be used, but it now has more of a muddy, mossy look than it had.

If all goes well, there will be new posts soon showing progress of my new work. I will be away over the weekend, so I hope the ideas that have been flowing don’t stop.

First New Art Quilt of 2010

Saturday, January 23rd, 2010

I finally got the creative juices flowing a bit yesterday, and finished the first FFFC (Fast Friday Fabric Challenge)  quilt I have attempted in a very long time. New challenges are posted on the 4th Friday of each month, with the idea of finishing a small art quilt by the following Saturday. I originally thought that this piece would be done before the next challenge was posted, but while double checking the rules for Challenge 40, I found that the next challenge had already been posted- yesterday was the  4th Friday of January- where has the month gone?

Cocoa Mix Box

For Challenge #40, we were to pay attention to product packaging  and how the colors used affect your perception and buying decisions of the products, and then use the colors from a selected package in a quilt. The piece was to be a still life, and be mostly plants or flowers. I drink hot chocolate every morning, and used one of the boxes for my color palette. I immediately thought of my favorite cobalt blue glass bottles, and wanted to include a couple in my composition.

Blue Bottles on Cotton

Photos of Blue Bottles Printed on Cotton Fabric

I am not great re-creating glass in fabric, so I decided to take photos of the glass and a spool of thread, and printed them onto fusible backed cotton fabric.

Cobalt Blue Glass Bottles

Group of Cobalt Blue Glass Bottles and Eye Wash Cup

Here is one of  the photos I used to arrange on the page to print onto the fabric. I placed them on, and backed them white card stock to take the photo. I love the gold design on the perfume bottle- my favorite.

Layout one.

Ist Layout Idea

This was the first version of the layout. I hadn’t remembered that plants or flowers were to be a big part of the composition. The original thought was to use the thread spools and some chunks of chocolate around the bottles… Not too hard to change direction a bit…. the short bottle could be a vase,  and I had thought of adding a white flower on the table anyway.

Quilt layout 2

Second Layout Without Thread

OK, to keep with mostly plant theme, chocolate and thread spools are out, bottles and eye wash cup still in. I found some great silk leaves in the perfect shade of coppery brown found on the cocoa box to back the white silk flowers. I added a stem into the open top bottle, ready for flowers. The chocolate colored fabric I had picked out was used for the stems and small leaves needed.

Art Quilt in Progress

More Progress

Here is what it looks like after flowers have been added, and stitching has been done. Most of the flower petals were stitched only down there centers, leaving them 3-dimensional.

Art Quilt Blue Bottles and Flowers

Blue Bottles and Flowers

Here is the “finished” piece…. The more I look at it, I think I need to figure out a way to make the white lace show up better. The bottles look a bit dull to me, and I may add a bit of gloss medium over them….. The flower centers could use some beads.  I guess I will have to hang it on the design wall for a while to see what happens.

Update- 1-27-10-  Well, after looking at it for a few days, I decided to add some beads in the flowers. Below is the most recent photo.

Art Quilt Blue Bottles and Flowers by Sue Andrus, Andrus Gardens

Newest Version of Blue Bottles with Beads Added

Art Quilt Blue Bottles and Flowers by Sue Andrus, Detail, Andrus Gardens

Detail shot of Blue Bottles and Flowers

This last photo shows more detail.  I even added a little gold butterfly resting at the base of the lower right flower.

Heart Pins as Valentine Gifts

Thursday, January 21st, 2010

With Valentine’s day arriving soon, I have been beading more of my heart pins. Yesterday, I delivered a batch along with other shapes to the local PA North Country Artisan Center and Store  in Towanda.  November and December were good sales months, and I really needed to restock.

Group of pins beaded Tuesday

This was the batch I beaded on Tuesday. I am liking the new heart shape a lot. This new shape will be perfect for Valentine’s Day sales, but is great for wearing any time of year.

Heart Shaped art Quilt Pin

Wonky Heart Pin in Black & White, Red and Pink

This photo shows my “Wonky Heart” much larger than it’s just over 2″ height and just under 2″ width. I was playing with the shape to give it some character, but am not sure if I sill do many more of these or not. This one gave me the most grief during the beading process. I usually don’t have very large sections of single fabrics, and ended up removing the first attempt at adding beads to the large upper left mostly white section. I like try number 2 much better… This along with the following pins are available for purchase in my Artfire Gift Items Studio- Andrus Gardens.

Heart Pin Pink Lime, Sue Andrus Andrus Gardens

Heart Pin in Pink and Lime with Butterfly

Heart Shaped Art Quilt Pin available in Artfire Studio, shown with Hershey Kisses for size reference.  Chocolate is also needed on Valentine’s day, too isn’t it?

Heart Pin as Pendant

Hot Pink and Black Heart Pin as a Pendant

The last pin of this group is shown hanging from a black satin cord. Most of my pins can be worn as pendants by simply pinning them to a chain, cord or simple necklace. This way they can be worn in more than one way. This mainly Hot Pink and Black Heart is also available on Artfire.

Any of my pins would make unique gifts for Valentine’s Day or any other occasion. If you would like to check out a wider selection of hand crafted unique gift items, there are lots of goodies to look at on Artfire. Click this link for the Valentine’s Day Gift Guide, or this one for the Unique Gift Guides.