Back to blogging about Art again! I haven’t written a post here about my Arts in the Cards ATC exchanges for a while, so here goes with the latest lesson in patience and learning…. This post was started a while back and I am finally finishing it and saving it from being stuck in “drafts” forever….
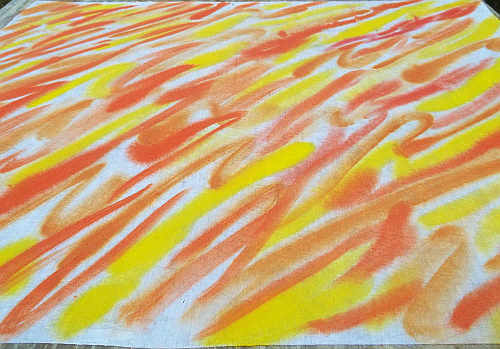
The theme for July was Jonquil… Our themes this year are colors, and the color prompts are open to interpretation which had made them very interesting and lots of fun. I began by painting fabrics in colors found in the beautiful Spring flowers. The first piece was done with oranges and yellows. The photo above shows the first streaks of colors added to the wet fabric on my paint table outdoors. The colors were layered on while keeping things wet until all the paint was applied, and I kept spritzing the fabric with water during the drying to allow the colors to run and blend into each other. In addition to the yellows and oranges, I also added some metallic gold for some shimmer.
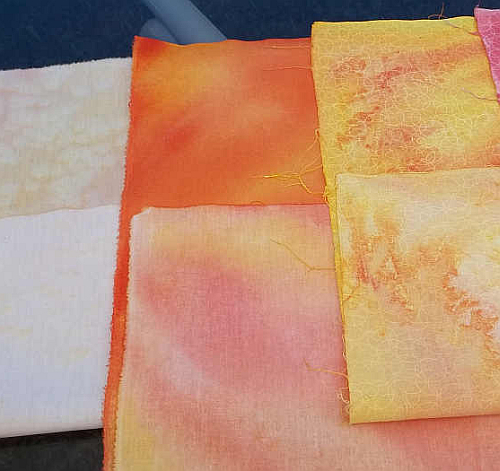
The photo above shows the deep orange finished fabric in the center, along with two others. I used the same paint colors for the two coordinating fabrics, just with more water for lighter shades. The lightest one was a fat quarter used to clean the paint out of the brushes… just enough left in them to give it a light wash of color. The medium colored piece began as a white print with circles on white fabric that added more interest to the piece. The photo also shows the backs as well as the fronts of the fabrics. Both sides are interesting to use!
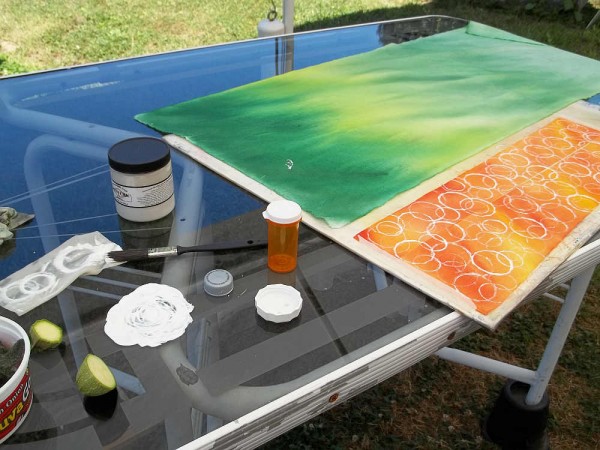
Since the medium colored fabric had circles on it, I decided to stamp circles on some of the dark fabric using various plastic bottle caps as stamps with white paint.
I have acquired a glass topped outdoor table to use under the “Big Top” (my tent set up by the front door) where I can play with paint on fabric in the shade and have easy access to my paint table that is nearby in the sun for drying fabrics. The glass is a great surface to spread paint on to dip the caps or whatever items I use as stamps. The above photo shows the orange fabric stamped with the white circles in various sizes. The pieces of Zucchini sitting on the table are waiting to be used on the green fabric on the table next to the orange for the next challenge with “Cucumber” as the prompt.
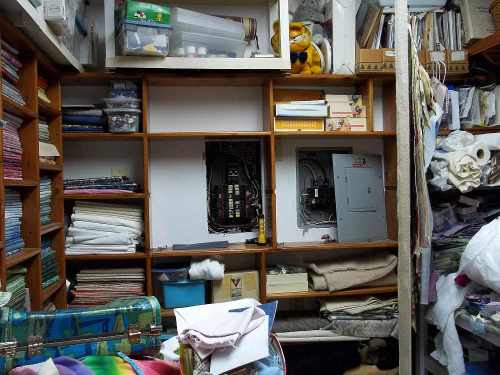
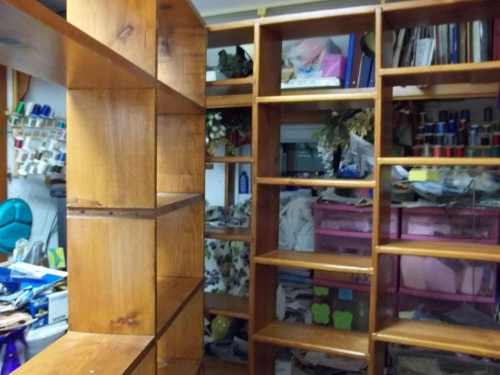
My original idea for these cards was to use the three fabrics together with the addition of stitching. The idea had to change almost immediately, due to a burned out main electric breaker… The breaker box lives Behind the set of shelves that lives Behind the TWO design walls in my studio… While trying to find a new main breaker, it was found the brand of box we had was a fire hazard… Not a good thing, so a brand new box was in order…. That left me moving everything that was on 2 entire floor to ceiling walls of shelves (where most of my fabric lived), as well as everything from my new ironing board shelves, everything from on and around the cutting table. What follow are a couple studio photos…
The photo above shows the wall after my foam design wall was removed and the plywood one was opened to reveal the offending box and wall that needed to be accessed… Note, the shelves are literally wall to wall and the back set is blocked by the South wall set… everything had to go…. UGGG!!
After a day of moving, this was what the view was just inside the studio door… The shelves were moved out of the way as much as possible. My sewing machine, iron, and lots more were also moved out as well as the thread that was still on the racks in the above photo to keep them safe from drywall dust and such… So much for stitching anything….
After hoping things would be back to “normal” in a week, I didn’t get much accomplished on the art cards. Then I decided I HAD to do them somehow, so the ironing board was set up in the kitchen for fusing and card construction began. (I also hoped that blocking half of the kitchen with the ironing board would hurry the process of getting my studio put back together along… it didn’t help much.)
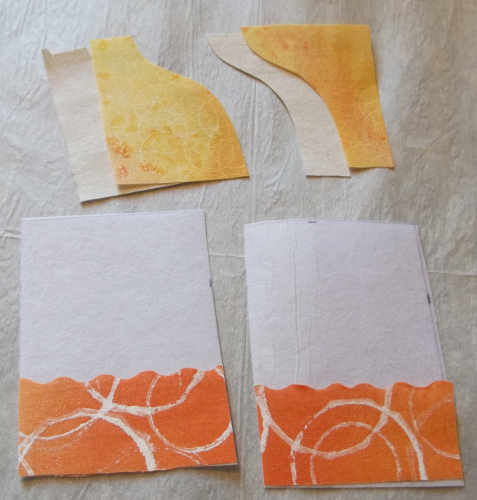
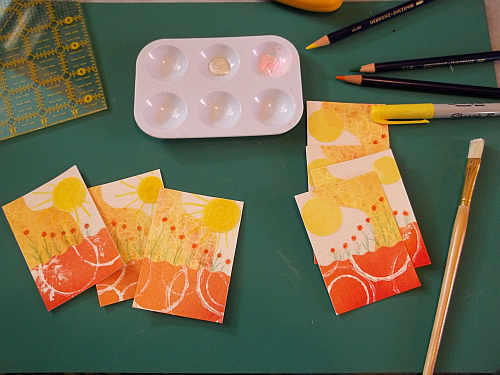
The pieces of fabric cut and fused looked pretty blahhh, especially since there could be no stitching involved, so I decided that I would add the yellow “suns”. I still didn’t like the look of them… still blahhh… not much to look at… so some supply digging was in order… Why is it that whenever things are packed up, I decide I just HAVE to use a certain item or 3??? It seemed every time I needed something, a major search ensued… I could not remember what pile or container or whatever I had packed things into…
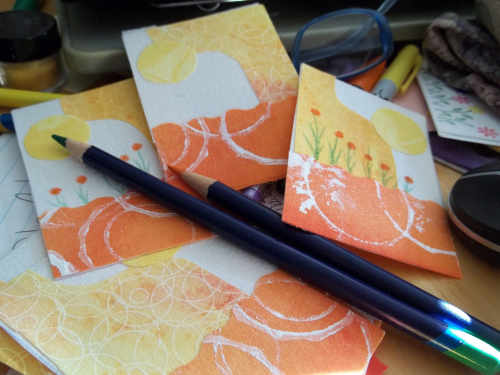
I finally found my Inktense pencils and played with adding some greenery to the cards… I really wanted to stick with mostly circle shapes for these, and maybe NO flowers… I tend to put flowers in or on everything…. Well… after a bit of scribbling and playing, I ended up with a row of lollipop looking flowers on each card.
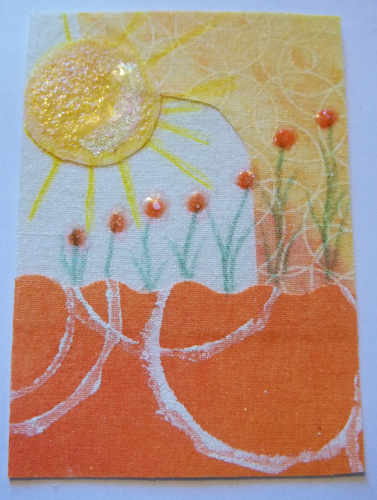
A bit more digging for supplies later, I found some pearlescent paint and fine markers to add a bit of interest to the suns with. They received bright sunrays and a little swish of pearl to give a bit of depth to them. I was liking them a bit more, but they still were calling for More! Hmmmm…. Maybe some glassy looking clear embossing??? More digging, and I found my bottle of Ultra Thick Embossing Enamel powder and the heat gun… Now I had not used the UTEE much at all, but knew it was supposed to be able to be used to create thick, glossy puddles if that was wanted… That is what I wanted…. Glassy, shiny suns…. I had read that I would need more than one coat to get the effect I wanted, so I began…. Layer one results in a quite bumpy look. Not knowing the proper way to add layer 2, I added more embossing ink and more powder and aimed the heat gun… the pink embossing ink didn’t disappear like it did in the first coat… Ikkkk! More heat added caused bubbling and a bit of smoke… OOPS!… more ink, more powder, more heat… More bubbles, more pink sealed inside the molten mass and no glassy smooth surface….
Above is the result of the first couple layers of the melted UTEE… I also added it to the lollipop flowers… You can see the pink embossing ink “nicely” encased in the melted enamel… Not the look I was after… The sun was sadly not smooth or shiny… Time for Youtube… After realizing I was in over my head, I found a few tutorial videos and learned how one was supposed to use this stuff…. So THAT’S how it’s done! I finally learned what I needed to do… Use the embossing ink for the first layer Only, then add the powder to the still molten goo immediately after heating the first layer, heat CAREFULLY again (avoiding smoke and boiling bubbles) and repeating until I had the look I wanted… WOW! That worked! Now why hadn’t I gone to the tutorials first?? Yea, I’m a stubborn rock-head who tries things on her own first… NOT always a good thing….
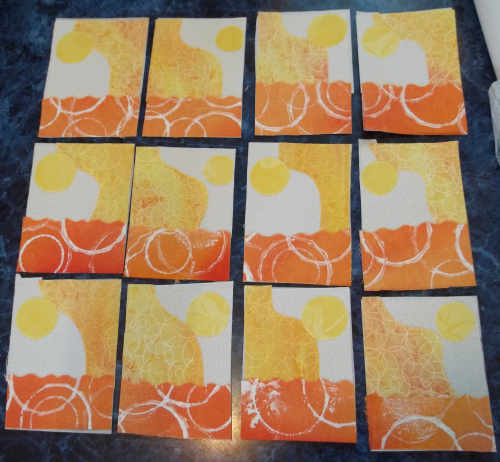
FINALLY! I had my cards pretty much done… The photo above shows a group of them after the UTEE was successfully added. (Note: upper middle card was the “guinea pig”, you can see it still has a deformed sun.) I was happy to finally have the thick puddles of gloss I was looking for! Now this wasn’t the end of the story for these cards… I did finish the edges with a stamp pad, then tried to flatten them out a bit since they buckled a bit with the heating…. OK, I learned another thing…. Pretty, thick glossy puddles of plastic will crack like glass if bent too much… I really got frustrated, but they were done and cracks and all were sent to their new owners…
Even projects that don’t work out the way you wanted them to can be learning experiences… Now I know how to work with UTEE, AND I know that it is much better to find some tutorials online when learning to use a new supply…. I guess one thing is for sure… I know this will not be the last of my lessons learned by trial and error (and more error)…. I have LOTS to learn 🙂

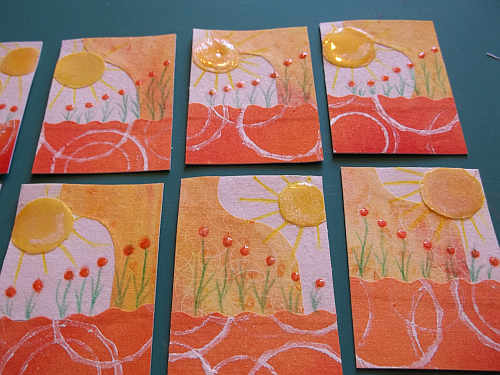



Beautiful final product.
FYI – the electric box should NOT be so hard to get to. IF you had had some kind of emergency, it would NOT be a good thing. Hope you redesign your work area. It would be fine to have a loose panel in front that could easily be moved in an instant.
BTW – when I bought my house I noticed it had a new electric box. I thought that was a good thing until I found out it was purchased from a company that went out of business so there were no more breakers for sale. I also had to get a new box. Learned a lot. As usual, I learned it the hard way.
Sue – I love your little cards. they are so happy and full of sunshine LOL. Your use of the glass topped table for psint is wonderful. I will put that in my memory bank – which is close to full!