Well, I’m slowly getting back to posting here more regularly. Since the last post I ended up doing Waaayyyy more organizing in the studio than I had planned to, made my cards for the Arts in the Cards exchange, got behind with my weekly journals and caught back up again. In the middle of everything else I even got a little bit started toward cleaning up one of the biggest “eyesores” in the landscape around here.
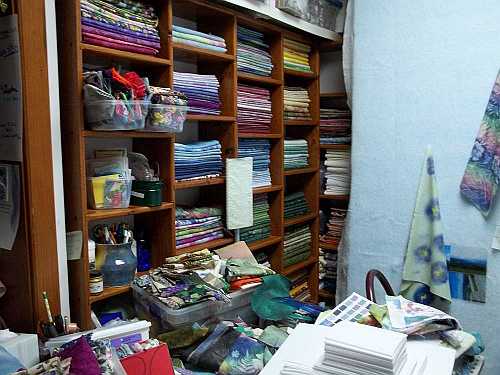
This photo above shows my shelves after I emptied every one of the “cubbies”, sorted and organized my fabrics. I have mostly my painted and dyed fabrics on the shelves now and will be selling off and storing what I keep of most of the commercial fabrics on the shelves in the office. Since my pot of pencils, pens, etc. seems to always be in the way on my table, I left a couple of the spaces free of fabric to keep things off the table.
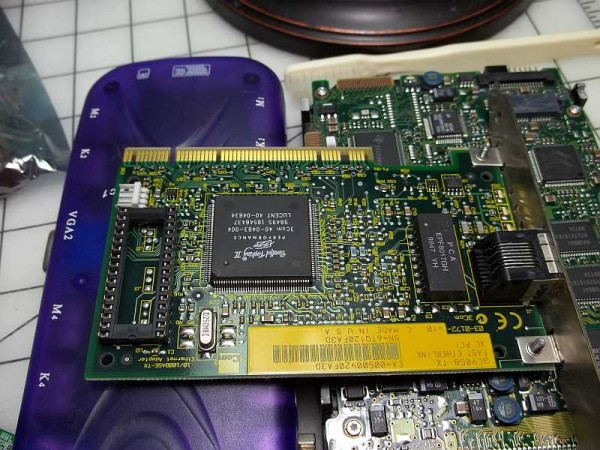
Once I got the cutting table cleared of debris again, I was able to get some of my projects done. The AIC exchange theme this round was Hardware…. Perfect, there is a lot of that around this place. My first thought was to see if I could find some little bits left from various computers that are stored in boxes… I soon found that nothing was small enough for an art card (and I wasn’t really into taking things apart… I leave that to my guys), I decided that I would use a photo of some of the parts as the background. I took a bunch of photos, and decided on a pretty simple layout.
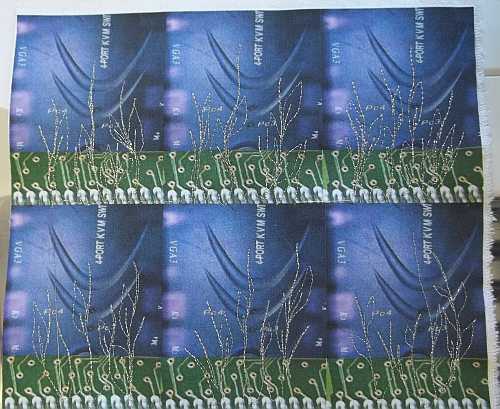
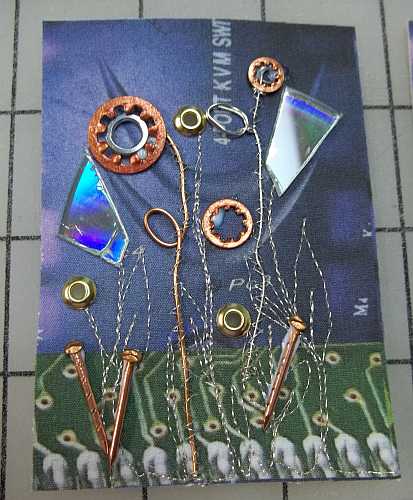
A photo of a circuit board of some kind? and one of part of some sort of hub-like purple thing (yea, I’m not geeky enough to know what is what) worked great together giving the feeling of sky and grass. You know me…. flowers always seem to pop up in my art. I printed the photo onto cotton fabric, then fused that to some canvas I had to give some stability. I knew I was going to have flowers, and after playing with my card (the 7th one that included a printing boo boo) I had an idea of where I wanted stems and leaves that I stitched with silver metallic thread.
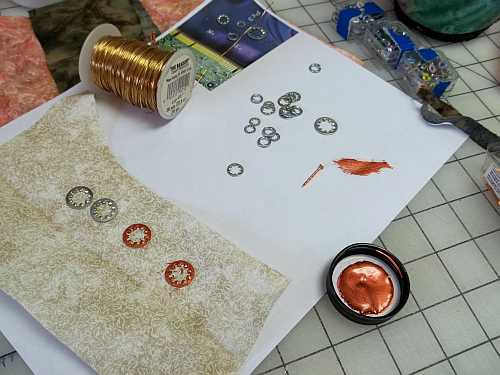
On a trip with Ken to Lowes last week, I did wander down the hardware isle and check out all the little fun goodies they had. I only bought a package of little copper coated nails. While looking for the computer parts, I had to walk past Ken’s woodworking and hardware stuff. I found some of the cute little lock washers that look like gears on their insides. He had lots of each size, so I “borrowed” one each of 3 sizes for each of the 7 cards I needed to make. I also picked out some small “regular” looking lock washers (again… I’m no hardware expert..:). Since my little nails were copper coated, i pulled out my Lumiere paint and turned the plain washers into copper colored ones. Working with those tiny little pieces, I got as much paint on my fingers as the washers.
I made two stems for each card out of copper and silver colored wire, and stitched them onto the bases (I only hit the wire once even with my terrible eyes). After laying out the washers and nails, I realized things looked too sparse, so I pulled out some tiny grommets for paper crafting that I had collected years ago, and decided since computer parts were used for the background, I cut up an old software CD to make a couple more “flowers” for each card. The photo above shows one card while the glue was still wet. The grommets were attached using a hammer and grommet tool, and everything else was glued on with gel medium. You’d think I would have learned after painting the washers that working so tiny, I should have found a pair of tweezers to help me out. Instead, I ended up getting as much glue on my fingers and under my nails as got on what was being attached to the cards. Once dry overnight, I printed up backs for the cards using more computer part photos, printed on a Radiant Gloss photo paper. The backs came out nice and shimmery, but the photo paper bubbled a bit with the heat of the iron when I fused it to the backs… Ahhhh another lesson learned.
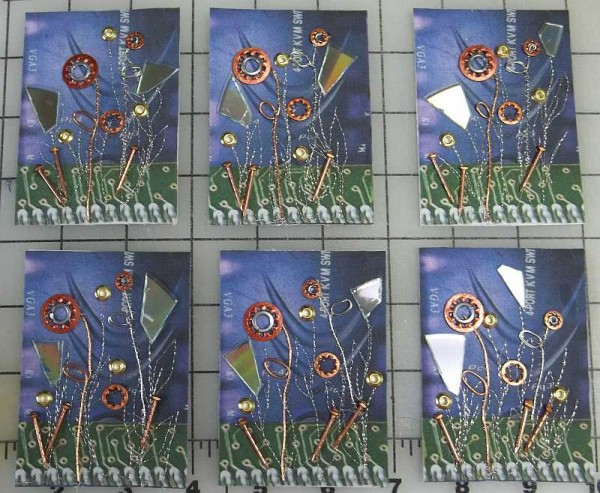
Above is the photo of the finished cards ready for mailing. There are 7 in this trade, so the 6 “good” ones get sent out, and the “guinea pig” one is mine to keep… Not exactly like these… it has all the trial and error boo boos on it 🙂
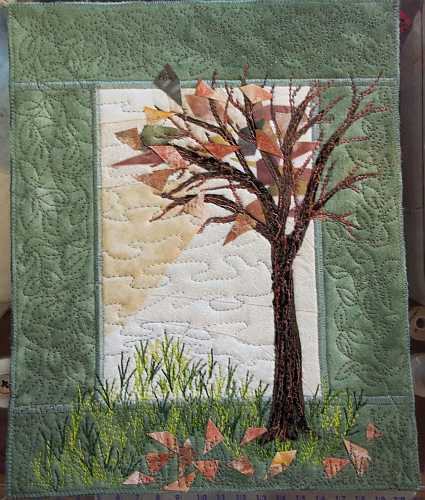
While doing my sorting and organizing in the studio, I found a bunch of unfinished projects dating back many years. As with the previous week’s journal quilt, I am using the smaller unfinished pieces for my weekly journal quilts. This was from my days of selling at art and craft shows, when I would work in batches. I would make up the bases of the pieces and then add the applique and quilting. This already had a few pieces fused on for fall leaves, so I finished it up with a tree.
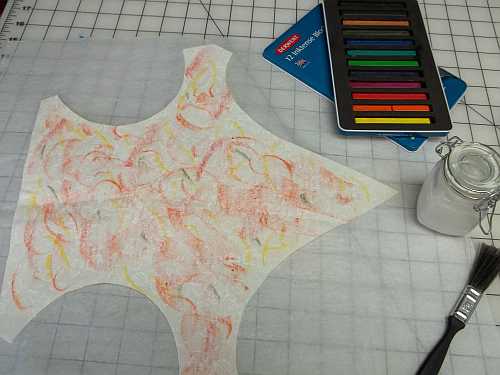
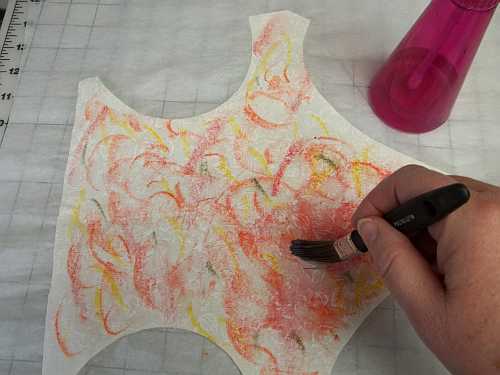
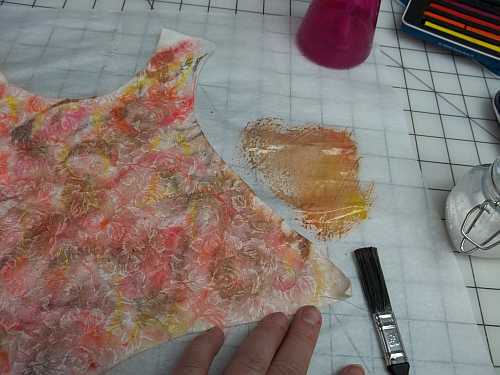
My tree needed more bright leaves, so I decided to color up some just for this one. The fabric is a leftover Wonder Under backed scrap from my placemat making days (that’s why the wierd shape). This piece is a white leaf print on slightly ivory fabric. I began by scribbling with my Inktense Blocks in orange, yellow, red, and a touch of mossy green.
I am still amazed at what happens when water is added over the Inktense blocks or pencil.
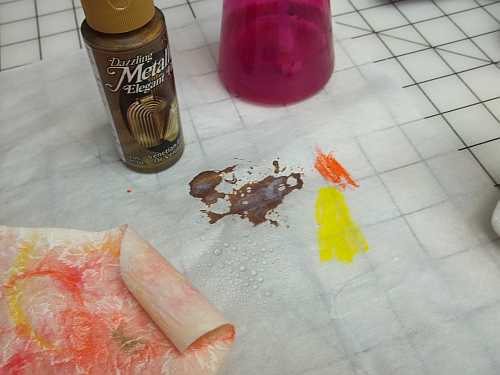
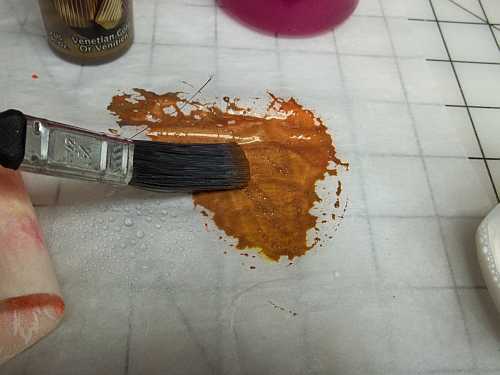
The colors were too light and I wanted a bit of shimmer, so I pulled out the metallic paints. This was a gold color and looked too brown to start, so I scribbled with the Inktense blocks on the parchment near my thinned gold paint.
Look what happened when I pulled the Inktense pigment into the metallic paint… much nicer color.
I liked the fabric a bit better after adding the mixed paint, but it still needed more, so I later added some more shades of metallic paints that I had on hand.
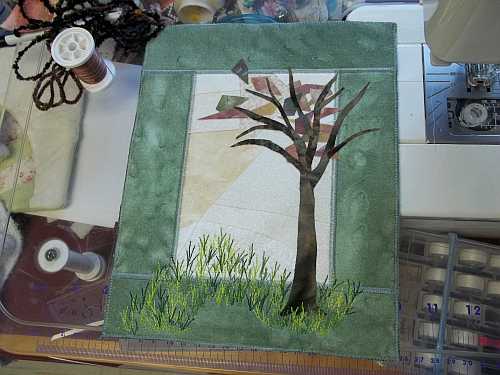
While the paint dried, I turned back to the quilt itself. I cut out and fused on the tree trunk and branches. Then I added the stitched grass using one of my variegated threads in shades of green. I just did a sweeping patch of the grass to give the piece some movement.
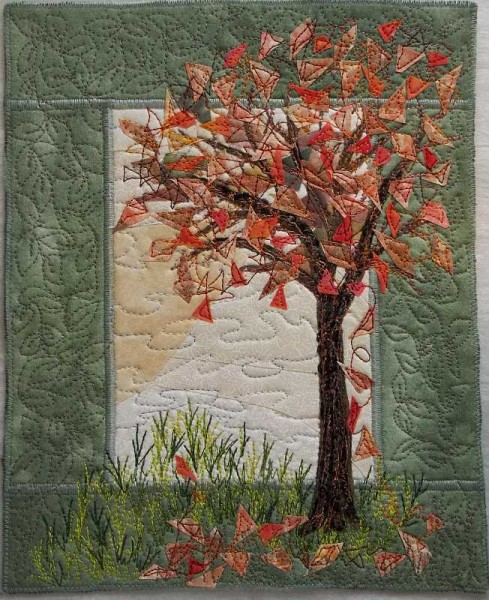
With the grass done, I needed to figure out what to do next. I added texture to the tree trunk with yarn couched on and added more branches by free motion stitching using a zig-zag stitch. This gave me heavier lines than straight FMQ would and it was fun to see how it turned out! I knew that because of the dense stitching in the grass and tree, I needed to keep the rest of the stitching and quilting dense, too. I used a pale variegated blue thread for the sky-like background, then I used a nearly matching thread in the green border and did a lot of tiny leaves vining around in the border. I also added more grass-like stitching along the bottom that would blend into the border. I fused a few fabric bits for fallen leaves and stitched the grass over most of them.
Once all the background quilting was done, I added the rest of the leaf fabric bits (some from a bright orange section of one of my dyed fabrics), and then stitched over them with a variegated thread in shades of orange through deep rust. I did this stitching to mimic the angled shapes I cut for the leaves. After steaming it out, “Falling Leaves” is just about 8″x10″. This is the firs one I think is “sale worthy” (others may have differing opinions 🙂 so I decided to list “Falling Leaves” is sold! See more in my Art Quilt Shop on ArtFire.
Once I had my week 5 journal quilt done, week 6 was due, so I pulled out another WIP and finished that piece, too.
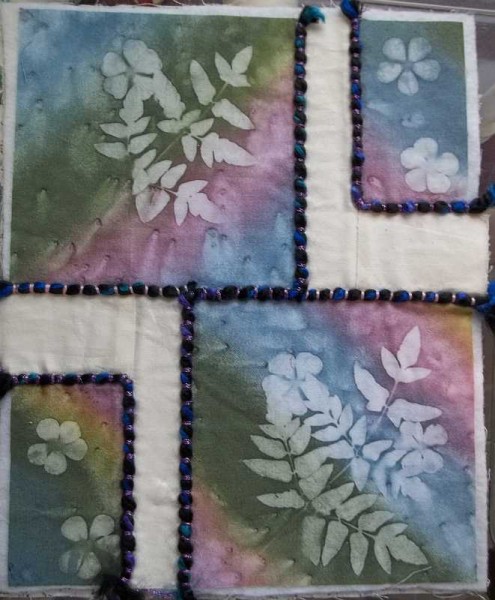
This was a piece I started back in 2006 on the trip to Houston’s Quilt Festival as something to keep me busy for at least part of 3 days in a car. I had fused the sunprints to the batting with the white accent fabric, then I hand couched the bulky yarn over the seams. I never got any farther with this until now.
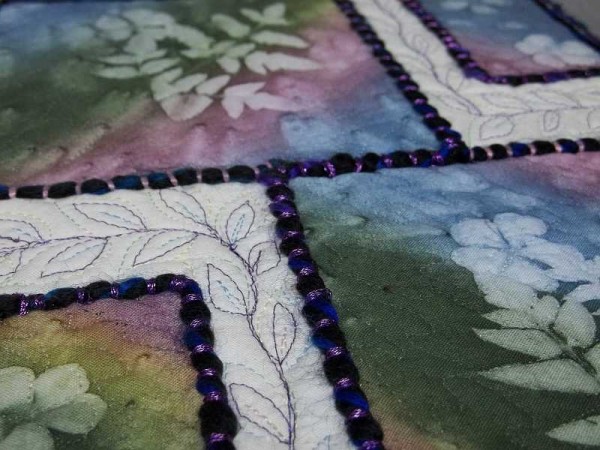
Since I have been wanting to play with my threads and stitching during this journal project, I decided to try something a bit different from what I normally would have done. I began with my “usual” vine quilting in the white areas using a pastel variegated thread that has all the colors of the sunprints. The stitching was pretty pale in color so I added more over the top with a purple metallic thread. Some of the yarn is stitched with a rosy purple metallic embroidery thread, so I thought I would add some metallic to the vines.
I didn’t do much new with the quilting in the sunprints themselves… I still like that the clear thread adds just enough texture to accent the prints without overpowering them like other threads I have tried do. To finish this off, I bound the edges with the same bulky black yarn with the colors in it that was used on the seams. A lot accomplished in the studio in the past weeks! Finally!
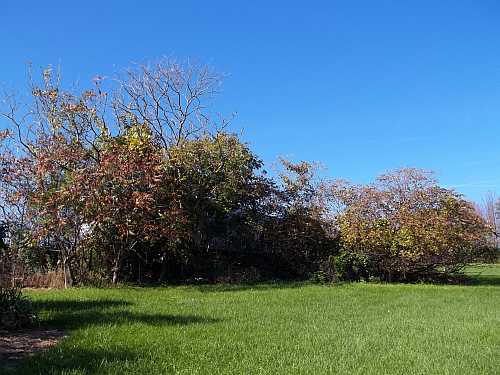
And to let you know that I have not totally been ignoring the gardens, here are a few photos. This one shows one of the worst “eyesores” in view of my studio’s North window. You can barely see the singlewide trailer that is a bit narrower than the one we live in that Ken is finally using as his woodworking shop. It is also where I make the wreaths in November and December. It is barely seen through the overgrown, falling down and obnoxious Sumac trees. The ones on the right of the photo fell down many years ago and are still lying there… I have had to mow around them and it’s not fun. In one way I hate to totally clear everything from here because the birds really love this mess. I plan to plant many of my baby trees in this area to have a neater and prettier bird sanctuary area. I have one huge pile of dead stuff ready to burn, and more is on today’s schedule to be hacked and burned, too.
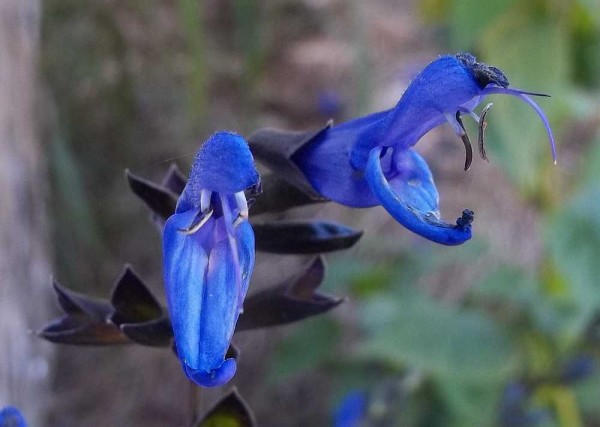
I am also still learning my new camera… Here is a closeup of a couple florets of the Salvia Black and Blue… Probably the only Salvia I really like (most of them have red flowers). This photo came out pretty neat, with the florets looking like open mouths of some sort of monsters. The color even is pretty true without playing in photoshop!
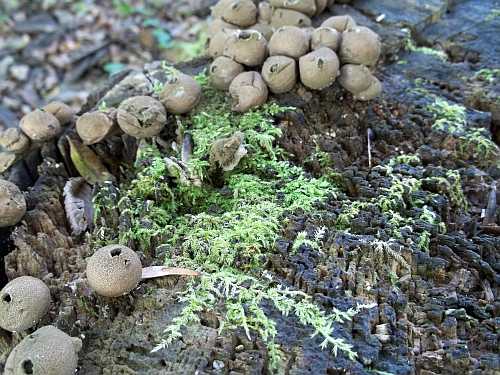
Thanks to Vladdi and Roxie chasing through the woods, I found this moss and puffballs on an old rotting stump. Vladdi and I were looking for Roxie who he left behind… She finally came slowly through the woods by the time we got too far.
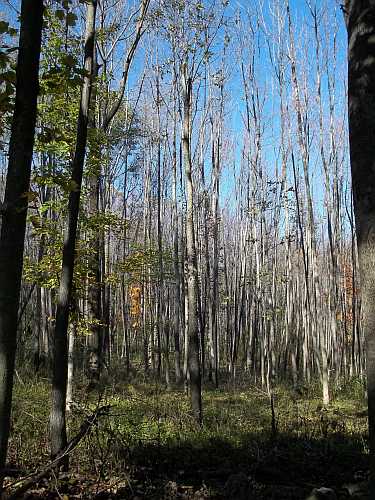
The last photo for this post… A shot of the trees in the woods. Lots of young trees, mostly Green Ash and Black Walnuts…. But a few more Sugar Maples are getting some size on them… They don’t seem to like the Walnuts… We usually get tons of seedlings, but very few live more than a couple years. There aren’t many Walnuts in the North end of the woods, and we are finally seeing some Fall color in that direction! Walnuts and Ash aren’t great for color… A little yellow for a short time. The Sugar Maples are the best! (in my opinion).






I love the atc’s! Fun way to use the hardware.
What an inspiration you are! So goofed around enough today. I must head to the studio/shop. Isn’t it funny, it’s a shop when you have to be there and a studio when you wanna be and feel creative.
Love the ATCs. You’re on your way. Also, it would be more correct to say that the Black Walnuts don’t like other trees….their nuts and roots give off a chemical which inhibits other trees and plants from germinating and farther away they will kill them off over time as their roots spread outward. They are sort of nasty trees…that’s why you don’t get the maples to live there. Lisa (who really dislikes Black Walnuts….almost as much as mulberry)
What an interesting post, Sue. I loved reading about the atc’s and journal quilts – great explanation of your process. Thanks for sharing.
Beautiful nature pictures! I’m glad you are feeling better.